Monday, February 29, 2016

Out-to-Lunch & Jones Special


Out-to-Lunch & Jones Special (sz. 1.5 & 3)


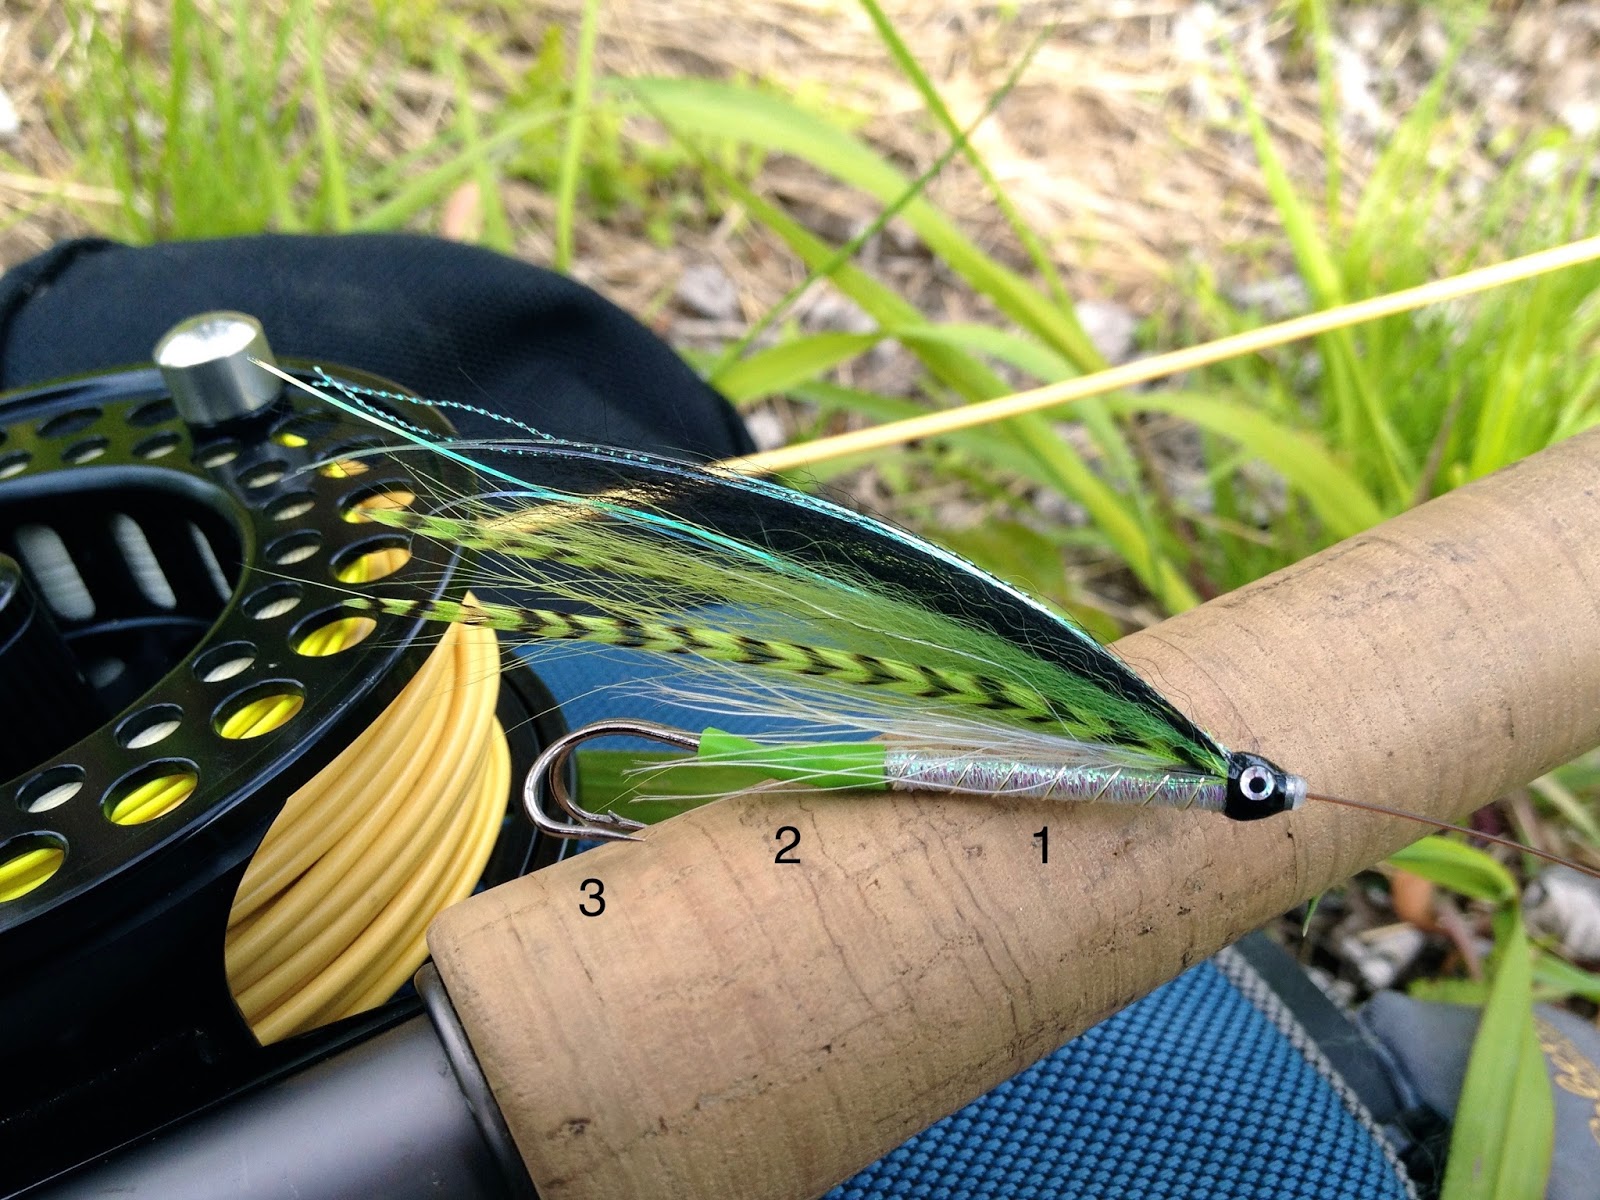
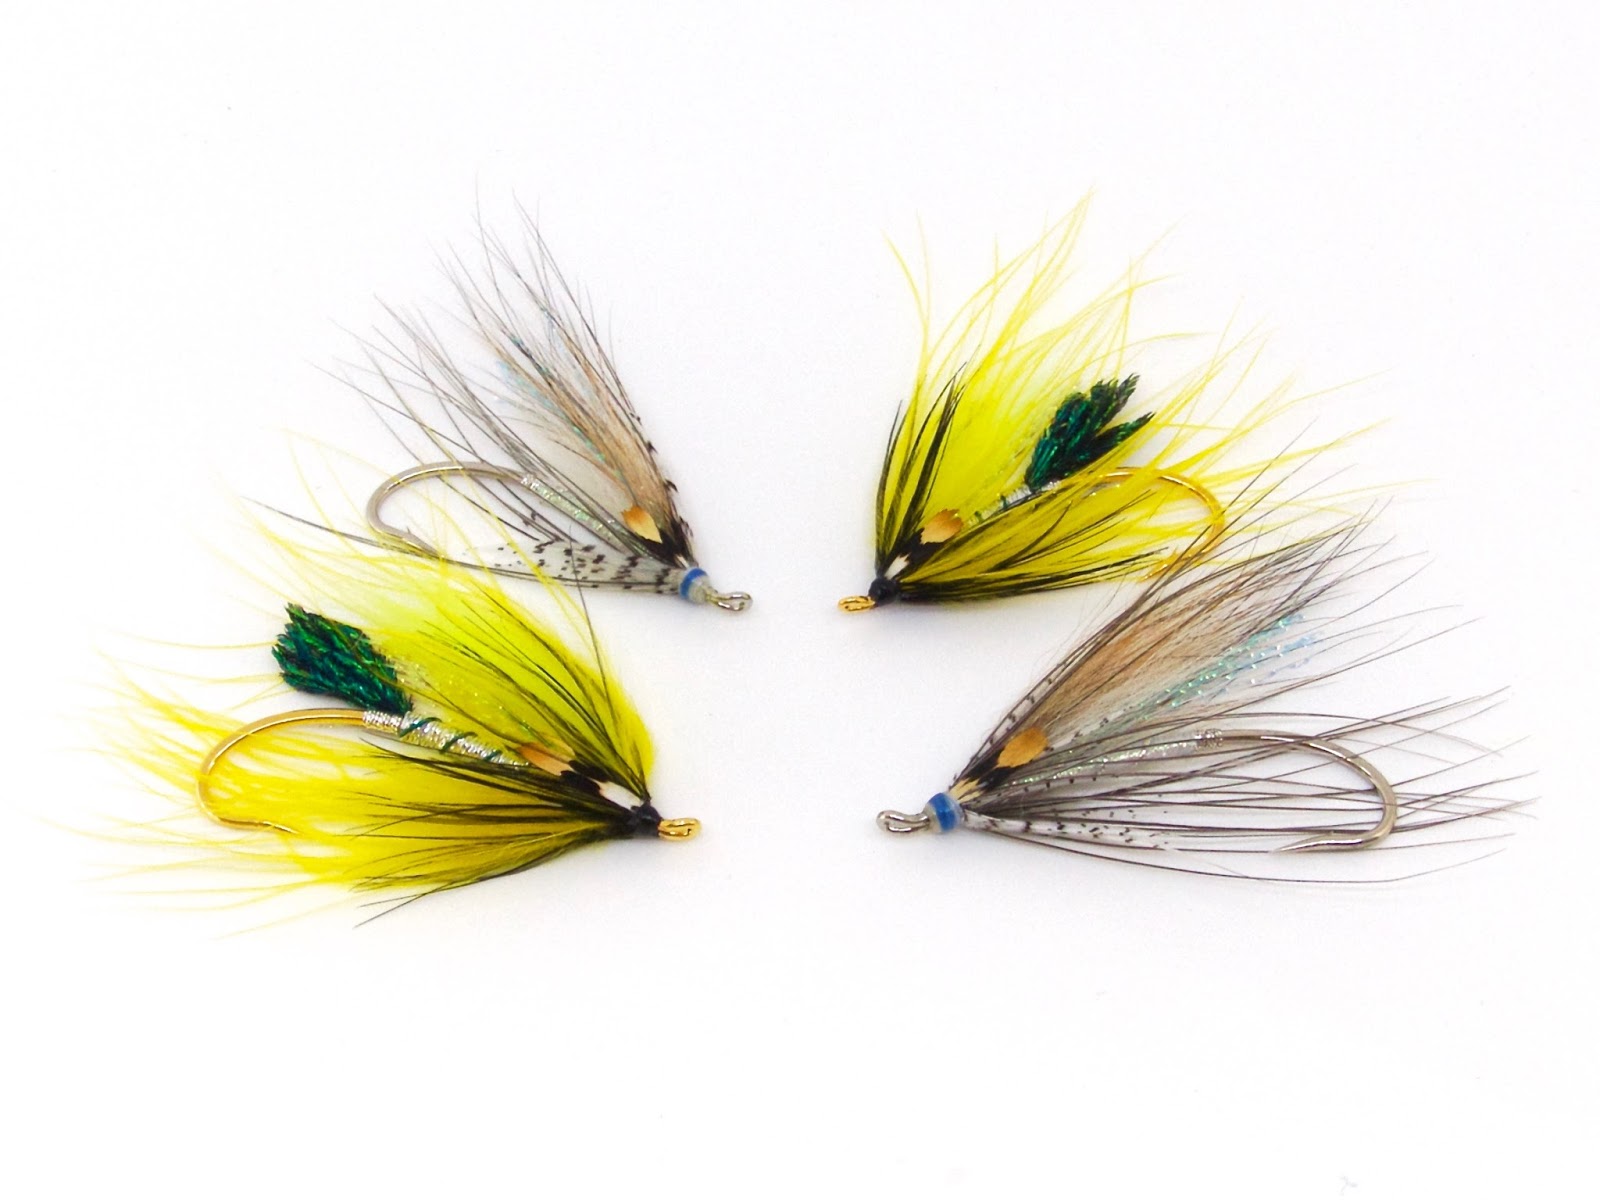
     As I'm sure many would agree, tying for a trip is the most fun kind of fly tying. Often times, I look at a fly and think, "Yeah, this is the one." Out of a pile of the same fly pattern, one particular one will jump out at me and earn a prominent place in my fly box. Sometimes a fly stands out to me for other reasons. These variations on Marc LeBlanc's Out-to-Lunch and Jones Special looked like flies I should consider using closer to home than the GaspĂ© Peninsula river for which they were designed.

     The Out-to-Lunch is one to try for Connecticut's broodstock Atlantic salmon. Last season, I fished and guided a few days during high, dirty water conditions. Those are exactly the conditions for which this fly was designed. As you can see, this is a highly visible fly, if not obnoxious looking. I am going to put a couple in my early spring fly box and see what happens.

     The original Out-to-Lunch dressing calls for embossed silver tinsel for both the tag and the body. I substituted oval silver tinsel for the tag and silver flat braid for the body. LeBlanc uses oval green tinsel for a rib on his Out-to-Lunch. I have no idea where to find that, so I subbed medium sized green Ultra Wire. The original dressing calls for a wing of lime green or olive Krystal Flash. I used lime green Krystal Flash, but topped it with yellow arctic fox to beef up the profile of the fly. Finally, LeBlanc uses yellow and black dyed heron hackle collars. I didn't have any yellow, so I subbed yellow marabou. For the black heron, I used a dyed golden pheasant rump feather. Not counting the hook and the thread, I used more substitute materials than I did original materials. I think the overall effect is similar enough to work fine when the fly is needed.

     Of the two flies, I prefer the look of the Jones Special. LeBlanc created the Jones Special to represent the silver smelt, a favorite food of sea run brook trout. Eventually, it became an effective Atlantic salmon fly. Before I tied a Jones Special, I thought it would be confined only to my salmon fly box. After tying my first, I looked it over as it sat in the vise jaws. Then it hit me. This will be a killer fly for spring sea run brown trout and striped bass. I can't wait to try it in the coming months.

     I stuck closer to the original dressing of the Jones Special than I did with the Out-to-Lunch. The only substitution I made was in the wing. I subbed fox fur for bucktail, a common substitution in modern salmon flies. Other than that, the dressing stays pretty true to the original.

     This winter has been short and mild. I can't really say that cabin fever has set in. I'm having a great time tying flies. It will be nice to get out on the water soon, though. When I do, I will have these two flies with me.


Out-to-Lunch (var.)

Out-to-Lunch (var.)

Hook: Alec Jackson 2065 (steelhead iron, gold); sz. 3/0-3
Tag: Oval silver tinsel
Tail: Peacock sword 
Rib: Green Ultra Wire (size Medium)
Body: Silver flat braid
Wing: Lime green Krystal Flash under yellow arctic fox 
Hackle: Yellow marabou, followed by golden pheasant breast dyed black (shorter than the marabou)
Cheeks: Jungle cock
Head: Black


Jones Special (var.)


Jones Special (var.)

Hook: Alec Jackson 2062 (steelhead iron, nickel); sz. 3/0-7
Tag: Oval silver tinsel
Body: Pearl flat braid
Wing: White arctic fox, under pearl blue Krystal Flash, under red fox tail
Hackle: Long gray heron-type spey hackle, followed by silver pheasant body feather
Cheeks: Jungle cock
Head: White w/blue band


Monday, February 22, 2016

Fit, Finish, and Glossy Heads


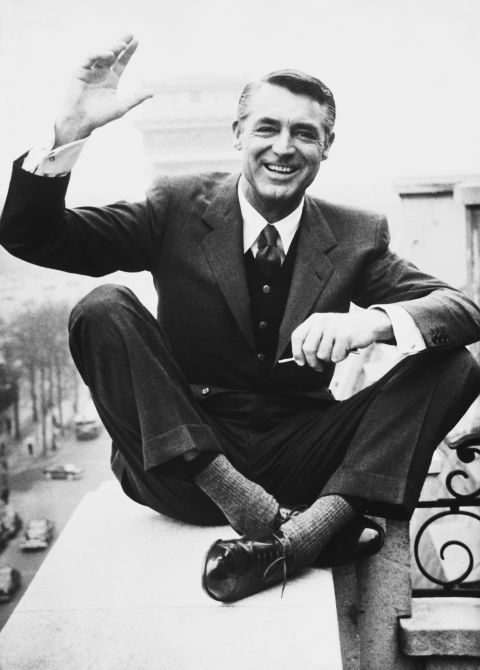
Cary Grant, showing how it's done

     I remember being fitted for my first suit when I was 18 years old. I buttoned both buttons on the jacket. The tailor mumbled something along the lines of, "Two button suit, top button only. Otherwise, you'll look like a hillbilly." It doesn't matter how much a suit costs. If it's not tailored well, it's not going to look good. Even if it is well tailored, there are plenty of other things to mess up. Fortunately, I had an older sister who looked out for me, so I was rarely a total mess at the school dance.

     A well tied fly is like a suit with the perfect fit and just the right touches. A well tied fly is proportionally balanced to the hook on which it is tied. The components of a fly should work together in perfect harmony, just like the combination of suit material, dress shirt, and tie. Little touches are nice, such as a pocket square, cufflinks, jungle cock cheeks, etc. As far as men's attire goes, the fit and finish is in the shoes. They should be well made, compliment the outfit and, most of all, be as shiny as they were when they were new. The head of a fly is the dress shoes of the outfit. A head should be sized in proportion with the rest of the fly. It should be durable and well shaped. Lastly, it looks better when it shines. 

     One of my favorite angling books is Fishing Atlantic Salmon by Joseph Bates and Pamela Bates Richards (Stackpole 1996). Michael Radencich's photography is superb. There is a staggering amount of information to digest in that book, in both text and images. The first time I read it cover to cover made me feel like I was drunk at a wine tasting. Subsequent reads allowed me to see the subtleties I missed the first time around. One of those subtleties was the way certain tyers finished the heads of their flies. To me, the most intriguing heads were on Keith Fulsher's flies. They were just the right size and their finishes were striking. They were glossy and bright, like patent leather. The heads looked like they virtually melted right into the eye of the hook. 

     At the time, I didn't know Keith, so I was unable to ask him about his methods. I decided to figure it out on my own. After a bit of trial and error, I settled on a method that provides me with similar results. Since then, I have become aquatinted with Keith. Because I found my own solution, I haven't bothered to ask him how he does it. 

     I don't finish every single fly I tie with a mirror-like head. In fact, most of my flies are not finished with this level of detail. I don't polish my dress shoes every time I wear them, either. When I want a fly to really sparkle, however, I have a process that is the fly tying equivalent of professional shoe shine.

A clean, nicely shaped head is the punctation at the end of a sentence.


Glossy Heads: Step-By-Step


(click images to enlarge)

Fig I: Staggering the cuts to make a tapered head

     The first step to getting a glassy, mirror-like head is the most crucial. A thread head should be well shaped and relatively smooth. Because we tie a head over uneven surfaces (such as hair and/or feathers), it won't be as smooth as underbody thread wraps. 

     The key to a good thread head is proper planning. For a head with a long taper, cut your winging materials with a long taper. Look at the Magog Smelt in Fig. I. The red throat hackle and the white layer of bucktail extend out the farthest. The second layer of bucktail (yellow), extends to about the midpoint of the head. The final layer of bucktail (purple), along with the peacock herl topping, is cut relatively short, to the 1/3 point of the head. The cuts form a natural taper. A smooth thread head can be formed by tying over the staggered wing butts. For a more blunt, round head, simply cut the butts at a less of an angle.

Fig. II: A neat thread head

     The procedure for feather wing flies is not much different. If the wing is tied in multiple stages (e.g. flies with an underwing or a built wing), leave the bottom materials long and cut the butt ends of subsequent winging materials progressively shorter. When tying a fly with a mixed or married wing, I either use a razor or fine scissors to trim the wing butts. With the former, I make an angled stroke through the butts. With the latter, I shimmy the tips of my scissors through the wing butts to cut the butts a couple feathers at a time. 

     However you choose to cut your wing butts and taper your head, the final result should look fairly neat without any lacquer (see Fig. II). Thick lacquer can fill in small spaces, but not big gaps or lumps of thread. Take your time and plan ahead. 

Fig. III: Cellire (thin) first coat

     The first coat of lacquer or head cement should be thin. You want the first coat to penetrate the thread wraps and add strength to the fly's head. I prefer to use Veniard's Cellire, but any thin head cement should work well enough. If your head cement is getting thick, make sure you thin it enough for it to penetrate the thread wraps easily. Look at Fig. III. The head has one coat of Cellire. See how the micro bumps are still visible? They will disappear in later steps.

Fig. IV: Black (thick) second coat

     To achieve a glassy head, it is important to let each coat of lacquer dry completely. I do not know exactly how long it takes. If the fly is meant for display or publication, I don't take any chances. I will let each coat dry for at least an hour. Apply the lacquer, then walk away and find something else to keep you busy for a while. 

     For a presentation quality head, it is helpful to boost the thread color. For a black head, my second coat is black nail polish (Sally Hansen's). It is a darker shade of black than black thread. If wax was used to help the thread adhere to itself, black lacquer will help remove the color inconsistencies. Black lacquer gives a fly a much deeper color and boosts the glassy effect in the finished head. A similar effect can be achieved with other lacquer colors (i.e. red, yellow, etc.). 

     Be extremely careful when applying any lacquer, particularly colored lacquer. One slip of the fingers and your beautiful wing can be ruined. The safest way to apply lacquer is in small amounts and with a fine needle or bodkin. Sometimes I use an applicator brush that has been cut to a fraction of its original width. It's much easier to make a mistake with the brush than with the needle, so proceed with caution. Fig. IV shows the head with one fully dried coat of black lacquer.

Fig. V: Clear (thick) third coat
This is my preferred stopping point.

     After the black lacquer dries, I add a top coat of clear lacquer (as shown in Fig. IV). I prefer a thick lacquer, as opposed to the thinner Cellire used in the first step. My favorite clear lacquer is Sally Hansen's Advanced. I've found it to make a slightly glassier head than the standard Sally Hansen's clear nail polish. Even though it's thicker than head cement, make sure your thick clear lacquer maintains its original consistency. From time to time, you might have to add a few drops of nail polish remover to prevent it from getting too viscous. 

     Notice how the small thread dips in Figs. II and III have been completely concealed by the thicker lacquers. If this head started out messier, more coats of lacquer might have been necessary to fill in the spaces. With every coat of lacquer, we run the risk of messing up the fly. Also, the head will get bulkier with each coat of lacquer. The shape can distort if too many coats of lacquer are used. Less is more. If the head of the fly is clean to begin with, three total coats should be enough (one each of thin/clear, thick/colored, thick/clear).

Fig. VI: Two coats of Cellire (thin)

     For contrast, look at the head of the fly pictured in Fig. VI. This head was finished with two coats of Cellire only. Notice the how the small thread bumps are still present. They wouldn't be nearly as noticeable if the fly wasn't magnified by the camera lens. Also, it doesn't have that deep black glossy look. I't's not a bad looking head, but it lacks the fit and finish of the head shown in Fig. IV. On most of my fishing flies, I omit the colored lacquer step and use either two coats of Cellire or one coat of Cellire and one coat of clear Sally Hansen's Advanced. 

Good luck and feel free to ask any questions you might have! 

Monday, February 15, 2016

Magog Smelt

Two slightly different flavors of Magog Smelt
 
     With most of my fly tying orders completed, I'm beginning to focus on tying for a June trip to two of Quebec's finest salmon rivers, the Bonaventure and the Grand Cascapedia. My first Atlantic salmon fishing experiences were on New Brunswick's Miramichi River. Years later, my fly box still leans heavily towards Miramichi patterns. At one time, I was inclined to fish these flies in any salmon river. They have worked most places I have fished them. Despite my success with Miramichi flies, I began to feel like I was missing out on the overall experience by not devoting more time to tying patterns that are more often used in other parts of the Atlantic salmon's range. For this trip, I decided to tie a number of patterns that are commonly used in the Bonaventure and Grand Cascapedia.

      I was most excited to tie flies used for fishing in high water. A lack of snow will probably result in lower-than-normal rivers for the time of year I will be fishing, so I anticipate using mainly smaller flies. Snow or no snow, rain can happen at any time. Instead of being caught with my pants down and not having enough high water flies, I decided to tie them anyway, even if I don't use them.

     I have been told that Magog Smelt is a popular high water fly on many Quebec Rivers. I am very familiar with this classic bucktail, having fished it for trout on many occasions, though I have never fished it for salmon. I have confidence in the pattern, so I wouldn't hesitate to try it under the right conditions.

Smelt snout brown

     My most memorable experience with the Magog Smelt was during an early spring trout fishing trip to Vermont in 2010. My friend Bobby was my guide and we were fishing an area not known to harbor many brown trout. Unlike many surrounding waters, the fish in this particular stretch of river are not stocked. Bobby stressed that we after quality, not quantity. Most of the river's inhabitants are wild rainbow trout, with a few native brook trout scattered about. Though we didn't find any monsters, we caught several fiesty rainbows and brookies in a few different streams. Brown trout are not often seen in the rivers we fished. After fishing a fast run in a large river, we moved to a slower stretch of water upstream. It wan't long before I felt something slam my bucktail. The fish was a strong fighter, but was eventually brought to hand. Bobby was shocked to see a brown trout. I was just happy to have caught a nice fish. Shortly thereafter, I landed a nice rainbow trout on the same fly.

     I'm not sure why I never bothered trying one for Atlantic salmon. I had a few in my salmon fly box for several years. They had been gathering dust, so I made a place for them alongside my trout streamers. If I have the chance to fish one in June, I will. If not, I've heard they make terrific striped bass flies.

Magog Smelt var. (sz. 3/0)


Magog Smelt (variation)

Hook: Alec Jackson 2062 (Steelhead Iron - nickel finish)
Tip: Oval silver tinsel
Tail: Teal flank fibers
Rib: Oval Silver tinsel
Body: Pearl flat braid
Throat: Red hackle fibers
Wing: White, yellow, and purple bucktail with UV pearl Krystal Flash; topped with peacock herl
Sides: Teal flank feather
Cheeks: Jungle cock
Head: Black

Monday, February 8, 2016

Using a Basic Sequence to Improve Fly Tying Efficiency


     Several years ago, when I had taken up tying again after a long break, I brought a box of dry flies, nymphs, and streamers to my local Orvis store. One of the employees showed my box of flies to the fishing manager, who was a former commercial fly tyer. I forgot virtually all of what the manager said that day. He talked a mile a minute and seemed to make tangental leaps throughout the entire conversation. At least at that time, I had a hard time following the advice he gave me. I did glom onto one specific thing, however. He told me to buy Production Fly Tying by A.K. Best.

     I bought the book and read it cover to cover. It was interesting, but it didn't speak to me quite as much as it spoke to the store manager. I am a slow tyer. For the most part, I don't mind being slow. I listen to music or comedy and use the time to relax. Not all of the book's messages were lost on me, however. At the time, I tied every fly one at a time, from beginning to end. Best made me rethink that process, especially when tying several flies of the same pattern.

     Shortly after reading the book, I began tying flies in stages. The more I tied a particular pattern, the more I noticed that each fly had natural "pause points." These pause points were places where it made sense to stop tying, tie off the thread, and tie the next fly up to that same point. Because I wasn't using all the materials for a pattern at one time, my tying desk was neater while tying a pattern. Pre-cutting materials saved a lot of time too, especially when it came to body materials. If it was tying anything with a bead or a cone, I put the beads or cones on all the hooks before I touched a bobbin.

     This isn't anything revelatory, nor is it anything that hasn't been talked about a thousand other times in the past. Since efficiency might be a concept foreign to new tyers, it's helpful to discuss it now and then. A tyer can take this as far as he or she wants. I am definitely not the world's most efficient fly tyer. I'm not a speed tyer, nor will I ever be a full-time commercial tyer. I don't like to tie with my scissors in my hand at all times, which is a huge time saver. Unless I'm learning a how to tie a new pattern, or if I only want to tie a single fly, I will use a basic sequence to help speed things up a bit. Though I am using a Buck Bug to demonstrate a simple tying sequence, the basic concept can be applied to virtually any type of fly.


Buck Bug/Green Machine Tying Sequence


Green Machine w/White Tail (green & red butt)

Hook: Mustad 3399A
Threads: White 6/0, Green GSP, and Green or Black 6/0
Tail: White calf tail or calf body
Butts: Chartreuse and Chinese red Uni-Yarn
Body: Green deer hair
Hackle: Brown rooster neck or saddle
Head: Black

Note: This is not step-by-step tying instructions. To see step-by-step instructions for tying a Buck Bug, refer to my ebook, Flies for Connecticut Atlantic Salmon, or see this tutorial


Step 1: Set aside all the hooks needed and separate them by size. In this case, I am tying a half dozen Green Machines, two of each in sizes 4-8.


Fig I: White thread materials

Step 2: Tie in all the materials which require a base of white thread (see Fig. I). Once the tail and both butts are tied in, half hitch or whip finish the white thread, set this fly body aside, and move on to the next hook. 


Fig II: The deer hair body is tied in with green GSP thread

Step 3: When all the tail and butt sections are finished, switch over to green GSP thread. Spin two or three clumps of green deer hair and tie off the green thread. Do not trim the deer hair yet. Place the bushy fly aside and repeat this step with the next fly.

Fig III: A small pile of bugs, ready for trimming

Step 4: Now the bugs are ready to be trimmed. Take one from the pile and place it in the jaws of your vise. Trim each body with either a double edge razor or a sharp pair of scissors. When finished, put the fly aside and trim the next one.


Fig IV: Trimmed body

Step 5: Once all the bodies are trimmed, switch to either green or black thread and add hackle to your fly. It helps to sort your hackle by size before this step if you're tying a lot of flies. After wrapping the hackle and forming a head, whip finish and put your Green Machine off to the side. 


Fig. V: Apply head cement to the pile of finished flies

Step 6: The final step is to add head cement to the finished flies. It is a good idea to clean off your work space before applying head cement in case of accidental spills.

----------------------------------------------


     This simple tying sequence can be easily modified to fit virtually any fly pattern. Like I said before, it's not a mind blowing revelation, but formulating a more efficient game plan can help speed up your tying a little. If you put away your materials after each step, it saves clean up time as well. For way more ideas on how to become a more efficient fly tyer, read Production Fly Tying by A.K. Best or watch a full-time commercial fly tyer in action. 

Monday, February 1, 2016

Fly Tying Demo and Tube Fly Presentation

Brûlé McSprat (sz. 1.5)
Learn how to tie in the Spey and Dee style at the CFFA Expo


Fly Tying Demo


Expo 2016

Maneely’s Banquet Facility
65 Rye St.
South Windsor, CT 06074

February 6, 2016
9:00am-3:30pm

--------------------------------

An Introduction to Tube Flies: Fishing and Tying


Quinnipiac River Watershed Association
540 Oregon Rd.
Meriden, CT 06450

February 11, 2016
7:00 pm


Monday, January 25, 2016

Undertaker Tube Fly

Simple, quick, and effective

There's not much to say about this one. The Undertaker is one of North America's most popular and effective Atlantic salmon flies. I wanted to tie a large Undertaker, so I decided to tie one on a tube. Instead of a wing, I wanted the hair to wrap around the tube 360Âş. 

A few hours after tying the first one, this fly proved itself effective. There's nothing fancy about it. Anyone can tie it. Try fishing it on a sink tip or sinking line. 


Undertaker Tube Fly

Tube: 1.8 mm plastic (1")
Junction Tube: PVC, tied directly onto the rear end of the plastic tube
Butt #1: Chartreuse Uni-Yarn
Butt #2: Chinese Red Uni-Yarn
Rib: Oval gold tinsel
Body/Dubbing Ball: Peacock Ice Dub (see notes below)
Wing/Collar: Black arctic fox, tied 360Âş around the tube (fairly sparse)
Cheeks: Jungle cock (optional)
Head: Black


Tying Notes:

  • I tie the junction tubing directly to the plastic tubing when tying this fly. The overlapping segment of junction tubing is just long enough to be covered by both butts. If junction tubing was placed over the butts, the "hotspots" would be obscured. Since the butts are an integral part of this simple fly, I thought it best to wrap them on top of the junction tube. 
  • Since the junction tube is a permanent part of this fly, make sure you use the most durable junction tubing you can find. Use a fairly long piece of junction tubing in case you want the hook to sit back near the end of the wing/collar. 
  • To see how the junction tubing is tied in, refer to the post linked here. 
  • Wind the dubbed body then wrap the tinsel rib. After tying off and trimming the butt end of the tinsel, form a dubbing ball in front of the body. This will help keep the wing/collar propped up when swimming through the current. 
  • The wing/collar in the fly pictured above is tied 360Âş around the hook. It's also possible to put the arctic fox in a dubbing loop and wind it around the tube. 
  • Another option is to substitute a couple turns of black marabou instead of the fox fur wing/collar.

Monday, January 18, 2016

Tube Fly Rigging Basics

Fig. I: The standard tube fly rig
1. Fly tied on a rigid tube (plastic or metal)
2. Flexible junction/hook holder tubing
3. Short shanked hook (single, double, or treble)

Over the past few years, I have given away many tube flies. Most recipients of these "gifts" had never seen a tube fly before. After a reasonable amount of time, I would inquire about the fly's performance. "I never tried it. I don't know how to use a tube fly," was a common answer. Rigging seemed pretty self explanatory to me, but I realized the problem was my own. Tube flies are quite different from conventional flies and I should have offered a little bit of instruction to go along with each of these flies. Hopefully, this post provide some insight on the basics. 

Regardless of how we choose to rig our tube flies, there is one thing each option has in common with one another. The hook is never permanently affixed to the fly. That is perhaps the single biggest advantage to using tube flies (for reasons listed here, amongst other places).  Since the hook is not a part of the fly, we don't need one hook per tube fly. A small assortment of hooks will suffice. 

The most common way to rig a tube fly is by using a flexible junction tubing (aka "hook holder" tubing) that slides over the back end of the tube fly. Junction tubing is most often made from silicone or PVC.  Silicone's best asset is its flexibility. It is my choice when I need to slip junction tubing over a tube fly with a thick body and/or when I use larger hooks. PVC is more rigid and durable. I use it for flies with bare tube bodies, with smaller hooks, and when a longer piece of junction tube is desired. I prefer to add junction tubing after tying the fly so I do not have to fumble with it while on the river. 

To see how this rig works, look at Fig. I. Thread the tube fly (without hook) onto the leader. Let the tube fly fall down the leader. Choose a straight-eyed, short shanked single, double, or treble hook. Tie the hook on with the knot of your choice. I use a clinch knot. After trimming the tag end of the knot, pull the tube fly back towards the hook. Then, pull the hook into the junction tubing. The hook should fit snugly inside the junction tube and the fly is ready to fish. 


Fig II: Hook inserted directly into plastic tube

Some flies are tied on tubes with a large enough inner diameter to hold a hook without the need for junction tubing. This is the case in Fig. II. Thread the fly onto the tippet, tie your hook on, then pull the hook into the body of the tube fly. Note: this will only work with plastic tube flies. The thin plastic tube that lines metal tube flies is too narrow to accommodate a hook. This method is preferable when using hitched tube flies, as shown above. For more information on fishing hitched tubes (and to learn why the tippet is threaded through the side of the fly above), check out this website.

Fig III: Loop knot and free swinging hook

At times, it can be beneficial to fish with hook situated far behind the fly. When the water is very cold, fish can be sluggish, resulting in "nips" or "short strikes." Look at Fig. III. If the hook was placed inside the junction tubing, a fish might not grab hold of it well enough to be hooked solidly. When short strikes become a problem, this type of rig can help. First, slide the tube fly up the leader. Next, tie a loop knot in your tippet. Don't make the loop too big or the hook will end up too far away from the fly. Finally, thread the eye of a short shanked, up-eye hook through the loop. A short length of small-diameter junction tubing is handy to "grip" the knot. If your tippet material is too thick, you won't be able to get it through the eye of the hook. If your tippet material is too fine, the knot might slip through the opening in the back end of the tube, allowing the hook to wind up near (or inside of) the junction tube. If a fine tippet is needed, look at Fig. IV below.


Fig. IV: Loop knot w/plastic bead

Using a small bead can prevent your knot from sliding into the back end of your tube fly. To do this, thread your fly onto the tippet like normal. Then, thread a bead onto your tippet directly after the tube fly. Tie your loop knot, then add your hook, just like the previous example. The bead will butt up against the back end of the tube fly. As long as the hole in the bead is smaller than your knot, the bead will keep the hook in place and the knot out of the tube fly body. 

Fig. V: Standard rig w/extended junction tube

An alternative to using a loop knot is to add a piece of junction tubing that is longer than normal (see Fig. V). For this purpose, I prefer PVC junction tubing to silicone. PVC is stiffer and doesn't flex as much as silicone does. As long as my PVC tubing fits over my tube fly, that's what I use. If silicone must be used, don't fret. Check your fly after sloppy casts to make sure the silicone junction tube hasn't flexed enough to foul the hook on either the fly or the leader.

I find the rig in Fig. V preferable to the loop knot method shown in Figs. III and IV. Both silicone and PVC junction tubing hold a hook more securely than a loop knot. Unless your tippet is thick, a loop knot may cause your hook to droop in slower currents. A longer piece of junction tubing can be used to support the loop but, if you're going to use longer junction tubing anyway, you might as well opt for the method shown in Fig. V. Another reason I like the long junction tube rig is the ability to make changes in hook placement quickly and easily. 

Whichever method is used, it is important to consider the aggressiveness of the fish before rigging up. When the water is warm and the fish are taking aggressively, I want my hook to sit closer to the front of the fly (see Fig. VI). If an aggressive taker grabs a fly with a hook mounted too far rearward, ithe fish might take the hook too deeply. When designing and tying your tube flies, take this into account. A fly with body as long as the materials might not be as useful when the fish are eager to inhale a fly. To make my flies as versatile as possible, I prefer to tie them so they can be used effectively with many types of rigs. 

Fig. VI: The Picasse tube fly with standard hook placement

----------------------------------------------------------

I hope some readers find this post helpful. I encourage you to look at other sources for more ideas. For those of you who might be interested in a more in-depth look at tube flies, their uses for multiple species, and their construction, I offer a presentation called "An Introduction to Tube Flies: Fishing and Tying." I would love to present it at your angling club, fly shop, or event. It has proven very helpful to those who were previously unfamiliar with the benefits of fishing tube flies. Click here for more information. As always, feel free to ask any questions you might have.