Showing posts with label Tube flies. Show all posts

Monday, July 2, 2018

Atomic Dog v2: Articulated Tube Fly - Part II


The first victim of the full Atomic Dog came from a river stuffed with herring.


     In my last post, I provided the recipe for the front half of the revised Atomic Dog. As I previously mentioned, the idea of an articulated tube fly had eluded me for years. One morning in March, I realized I had been thinking of the design all wrong. All along, I was trying to figure out how to articulate the tubes themselves, which never seemed to produce results that made any sense. Then it hit me...articulate the tube fly hook, not the tube.

     The Atomic Dog was an ideal candidate for an articulated rear section. It didn't take long think of a suitable design. All I needed to do was to tie an articulated, Lefty's Deceiver-style pattern in back, then merge it with the front of the tube fly. The rear section would add length, volume, and would significantly increase the action of the fly. Because it can detach from the tube fly, the articulated section would behave just like a single tube fly hook, except with two hooks. Here is the rear section, followed by the recipe:


Articulated rear section 

Atomic Dog (articulation):

Rear Hook: Egret tube fly hook (sz. 2)
Tail: White saddle hackles, tied Deceiver style 
Collar: EP Ultra Brush 5" - snow white
Wing: White bucktail (or other stiff hair)
Head: White

Front Hook: Owner Aki (sz. 2/0)
Articulation: 40lb. Maxima with a short length of plastic tubing 
Thread: White, covering the hook shank and monofilament, and covered in UV cured resin 


So the entire dressing is in one place, I will repeat the recipe for the tube fly section here....


Atomic Dog, front (tube fly) section

Atomic Dog

Tube: Plastic 1.8 mm 
Junction Tube: Largest inner diameter PVC tubing (old HMH tubing is perfect)
Tail: Fluoro fiber-fluorescent pink, tied on top of the junction tube
Butt: Ice Dub-pearl
Wing 1: White marble fox and pearl Flashabou, tied Temple Dog style; followed by 2-3 turns of EP Ultra Brush 5"-snow white
Wing 2: White marble fox and pearl Angel Hair, tied Temple Dog style; followed by 2-3 turns of EP Ultra Brush 5"-snow white
Wing 3: Light Blue (or other color) cashmere goat over pearl mini Lateral Scale (as long as possible); followed by 2-3 turns of EP Ultra Brush 5"-snow white
Collar: Silver pheasant dyed light blue (or color to match Wing 3)
Eyes: Jungle cock or substitue 
Head: White or cone (optional)


The full Atomic dog, with articulated section joined to tube fly

Some notes on construction and use: 

-The white bucktail topping should extend as far back at the fibers from the EP brush collar. The stiff bucktail fibers help to prop up the wing of the tube fly, preventing it from fouling. Some fouling is inevitable, however, I tested this fly all spring and had minimal problems with fouling (especially after using the length of tubing between hooks). 

-So far, the 40lb. mono has been strong enough to withstand fish pulling on it. That said, it should be checked now and then to make sure it hasn't been compromised. If I remember correctly, most of the fish I caught were hooked with the front hook. 

-Because the rear section takes the brunt of the abuse, I tied two rear sections for every front section. So far, all of the sections have held up pretty well. The front sections definitely show less wear and tear, though. Since the fronts are the labor-intensive part, it's nice to only tie half as many. 


     When I had this idea, the first person to whom I sent a picture was my friend John. At the time, he was tying some Sunray Shadows for Atlantic salmon fishing. He liked the concept and tied some thin, black saddle hackles onto a hook and made and extra long, super mobile Sunray Shadow. I'll check back in with John later this season to see if his articulated Sunray Shadow worked. I will definitely try some for stripers next spring. It might make a good eel pattern. 


-------------------------------------------

     I hope you enjoyed a new look at tube fly design. It definitely opens up some possibilities for those willing to take to experiment. Hopefully, I'll have a chance to fish more flies like this in the future. I have some ideas for a smaller, articulated tube fly for reluctant broodstock Atlantic salmon, so stay tuned...


Monday, June 25, 2018

Atomic Dog v2: Articulated Tube Fly - Part I


The Atomic Dog color scheme was taken from a well worn Beast Fly, tied by R.M. Lytle.


     Over the past few seasons, I've had a lot of success with a Temple Dog/Samurai tube fly variation I call the "Samurai Dog". It has caught striped bass, resident trout, sea run brown trout, smallmouth bass, broodstock Atlantic salmon, and a few other fish for me. My friend John fishes the fly more than I do and he has caught all sorts of good stuff with it, including steelhead and some very large trout. Here are some variations I like to use:

The original is almost all white, but the white/chart works well, of course.

An all orange Samurai Dog is my #1 Naugatuck salmon fly for very dirty water. 

Here's one tied Russian Bullet style (3 cones in the body)

Another Russian Bullet hybrid I call the "Surgeon General," which is
based on a fly called the "Back Doctor Special". (shout out to Pär in Sweden!)


     They have all worked great, particularly the original white Samurai Dog, as well as the orange. I use the white in the spring and the orange in the fall. I use the black in both seasons and the white/chartreuse when stripers are around.

     As great of a fly as the Samurai Dog has been, my only gripe is its lack of length. When herring are on the menu in spring, I felt like the fly was too small. I tied a fly I called the "Atomic Dog (now retired)" but, as good as it looked to me, it didn't perform well. I swapped materials and got a little more length and volume out of it. It caught fish, but I wanted an even bigger fly. 

     I had been trying to figure out how to articulate a tube fly for a while. I had all sorts of complicated, impractical ideas. Finally, the solution hit me. I needed to tie the larger Samurai Dog, but with one key modification, then tie a fly on an articulated pair of hooks. It's a lengthy process, so I will explain the first part now and save the back end of the fly for the next post. The original fly works fine on its own with just a single hook. 


Front section of the new Atomic Dog, which can be fished as-is

Atomic Dog

Tube: Plastic 1.8mm 
Junction Tube: Largest inner diameter PVC tubing (old HMH tubing is perfect)
Tail: Fluoro fiber-fluorescent pink, tied on top of the junction tube
Butt: Ice Dub-pearl
Wing 1: White marble fox and pearl Flashabou, tied Temple Dog style; followed by 2-3 turns of EP Ultra Brush 5"-snow white
Wing 2: White marble fox and pearl Angel Hair, tied Temple Dog style; followed by 2-3 turns of EP Ultra Brush 5"-snow white
Wing 3: Light Blue (or other color) cashmere goat over pearl mini Lateral Scale (as long as possible); followed by 2-3 turns of EP Ultra Brush 5"-snow white
Collar: Silver pheasant dyed light blue (or color to match Wing 3)
Eyes: Jungle cock or substitue 
Head: White or cone (optional)

     You can see Håkan Norling tie the original Temple Dog here. This video is very helpful. If you have never tied a Temple Dog, this video is a "must see". The Striper Dog is essentially a Temple Dog, but with no real body. The EP brush takes the place of the wraps of soft hackle that Norling uses in his fly. Instead of nesting tubes, flexible junction tubing is used to hold the  hook. It needs to have a large inner diameter to accept the articulated hooks. When used with a single hook, the hook must be big and stout enough to stay lodged in the junction tube. I use an Owner Aki, size 2/0 or 3/0. It is made with very heavy wire and has a big eye. 


     In the next installment, I will explain the steps to extending this fly by adding an articulated section. Also, I will explain the benefits of the articulated rear section. Click HERE to read Part II.


Wednesday, January 3, 2018

News & Events - Winter 2018


A nice December salmon, caught by angler Anthony Lombardo

     The recent Arctic blast put an abrupt end to salmon fishing in Connecticut. It had been productive right up until the changeover. The last salmon I hooked was on Christmas Eve. By Christmas day, it was unbearably cold and the river was on its way to freezing up. Unfortunately, we lost my favorite month of the season this year (October). Despite that, fishing was still good, although we had to resort to late season tactics virtually the whole time. Both guiding and fishing, tubes were the most successful flies for me this season, the best ones being the German Snaelda and the gold body Willie Gunn. Other successful flies were the Ally's ShrimpDirty Water Dog, Green Spey, Out to Lunch, Picasse, Golden Shrimp, and Orange HKA Sunray/Bismo. As you can see, mostly tube flies...


Interesting color, especially for a holdover trout

    The salmon fishing was fun, but the highlight of the season was the number of larger-than-average brown trout in the river this fall. They were a nice bonus and were just as welcome as salmon. The fish pictured above took a big Out to Lunch in high, dirty water. I rested the pool for as long as I could allow, which was only about 30 minutes. I went back at it and caught him again, this time while reeling up a Dirty Water Dog! Based on his color, I suspect he was spawning and highly territorial. He wasn't a wild fish, but still a nice surprise. 

     Now it's time to tie some flies, clean my gear, and get ready for the March thaw. If recent trends continue, it might be an April thaw this year. In any case, I'll probably hit the Naugatuck again when the time is right. Spring can be very productive some years, so it will be interesting to see what is in store for us in 2018. 

----------------------------------


Sunray Shadows


     Next Wednesday, January 10, I'll be leading the fly tying night at the Bear's Den in Taunton, Massachusetts. It will be an introduction to tying tube flies. We will be tying the Sunray Shadow, a deadly fly for virtually all species of fish. It is one of my go-to spring flies for salmon, trout, sea run trout, smallmouth bass, striped bass, and anything else that will eat it. It is a simple fly and a great way to learn about the benefits of tube flies.


     On February 3, I will be tying flies at the Connecticut Fly Fisherman's Association 48th Annual Expo at Maneely's in South Windsor, Connecticut. I have no plan to tie anything in particular at the moment so, if you have anything you might like to see tied, let me know. You can comment on this post or contact me here. It's a great small show and one not to be missed. Stop buy and say hello!


Jock Scott 


Saturday, November 25, 2017

Naugatuck Report - November 25, 2017 - A Welcome Surprise


Bruiser brown trout 

     Today was the first day so far this salmon season where I could fish all day long. The day started off with a salmon in net right away. I was betting on fishing close to the surface today, but I threw on a Shumakov Golden Shrimp on my second pass through the first pool. Luckily, that did the trick for a morning salmon, just as it did two seasons ago in the same pool.

    I was still betting on action close to the surface, but it never came. After flogging three more pools, I switched to the sinking rig. It was a bust at the first pool, but it worked like a charm at my final stop of the day. I didn't plan on being there as long as I was, but the fishing was really good, so I stayed. I had to throw long bombs to reach the fish. I used a 5.6 ips versileader and a small German Snaelda, which has been a very good fly for both me and my clients lately. 

    The first pull was a good one, but it fell off immediately. Further down the run, I got my surprise...a bruiser brown trout! And on the Snaelda, of all things. It was bigger, and fought harder, than any of my salmon so far this season.

Salmon and Snaelda

     Then, it was two more salmon on the Snaelda. I switched to a gold body Willie Gunn for a change of place, then nailed one more salmon. It was a good day for sure. The water was 44º and the air topped out around 58º. The flow, 238 cfs, is getting low for this time of year, but it is just right if you know where to go and can handle a switch or spey rod well enough to cover the lies. 

     What do all the flies have in common? They are all yellow, orange, and black, a killer combo for this time of year. The German Snealda and the Willie Gunn can be found in my ebook, Flies for Connecticut Atlantic Salmon: How to Tie and Fish Them. The Golden Shrimp recipe can be found below. 

     There are plenty of good days left this season! I'm looking at the 10 day forecast, and the weather looks favorable every day. Care to take a trip? Let me know, even if it's last minute...


------------------------------------ 

If it ain't yellow, orange, and black, put it back! 

Golden Shrimp (Yuri Shumakov)

Tube: Shumakov Long Range (brass, 4 mm), grooves painted red 
Thread: Glow red or fluorescent orange
Wing: Two sections golden pheasant tippet dyed red (sub natural gp tippet in pic); yellow bucktail; two strands pearl Midge Flash; hot orange arctic fox
Hackle: Yellow dyed badger over orange dyed badger 
Head: Glow red or fluorescent orange


Monday, September 4, 2017

Connecticut Broodstock Atlantic Salmon Season: Favorite Flies, Month by Month


A Green Machine, fished wet, accounted for three salmon in 30 minutes this October day.

     Following on the heels of last week's post, this week's post is about my favorite fly for each month  of the fall, plus a bonus winter and spring fly. I like tying almost as much as fishing, so it is difficult for me to narrow it down to one fly for each month, but I will do my best. Since fly selection is dependent on conditions, try not to think of these as the best flies to use as much as they're flies to always have on hand.

German Snaelda tied on a brass tube

September: My fly of choice is an unusual one for an unusual month. I have only experienced broodstock salmon fishing in one September (2013), but it was a great month. As expected, the water was low and relatively warm. As such, any angler would expect small flies to work well under those conditions. They did, but a surprising revelation was that a small German Snaelda, tied on a heavy brass tube, worked like a charm when the salmon wouldn't rise for the usual stuff. Since the fish were holding in the fastest water, a heavy tube fly got through the chop quickly and I hooked several salmon on the Snaelda that September. Actually, I got my clocked cleaned by one that took off like a banshee and cartwheeled all over the pool. It was one of three fish hooked on the tube fly that afternoon. Though I would always try a small wet fly first, I wouldn't be without the German Snaelda in very early season fishing.


Buck Bugs in various color schemes


October: It's a tough call, but I have to choose a Buck Bug, which is the most versatile fly of them all. Tied with a body of spun deer hair, a Buck Bug can be fished like a traditional wet fly, fished with the riffling hitch, or greased and fished as a dry fly. My favorite is the Green Machine with a white tail.  If you tie your own flies, make sure you don't pack the deer hair too tightly. 


Mickey Finn var. with fluorescent red bucktail


November: Now it's time for the king of all broodstock salmon flies, the Mickey Finn. Really, there is no bad time to fish a Mickey Finn. I could have made it fly of choice from September through December, but that wouldn't be much fun. I have had success on Mickey Finns from size 2 down to size 14. My favorite sizes are 6 and 4, particularly the latter for fishing in November. I like to tie it with a couple minor variations. I use a flat braid for the body. I find it holds up better than flat tinsel because it shreds rather than breaks. Sometimes I use regular red bucktail and red Krystal Flash, other times I use fluorescent red bucktail without Krystal Flash. I am particularly fond of the fluorescent red variation. It's almost a magenta color. When in doubt, use a Mickey Finn.


The Gold Body Willie Gunn is a great big fish fly

December: Early December is a great time to target big salmon. Without a doubt, my favorite fly for these big brutes is the Willie Gunn, tied with a gold body. In late November and early December, large fish might still be holding near the heavy current. Tied on a copper tube, this fly gets down fast. A sinking tip or line helps keep the fly down. It is an aggressive presentation, but it often times effective. One of the largest broodstock salmon I've ever landed took a gold Willie Gunn, one of three fish on that fly that December day. It is a very easy fly to tie and a good one for those learning to tie tube flies. 


The Grape tube fly, tied with lots of flash

Winter (January-March): This time of year is all sunk line work with a slow, mobile, aluminum tube fly. What is more mobile than marabou? The lethargic winter fish usually follow a fly from behind and nip at its rear end. Because of this, I like to use an exceptionally long piece of junction tube with the hook extending beyond the back end of the marabou. It helps to hook the "nippers". Other color combinations work well, but I have caught most of my salmon with the Grape. Any big, fluffy fly should work, but keep that hook way back.


The Sugerman Shrimp, my all-time favorite salmon fly

Spring: Now it's time for my all-time favorite salmon fly, the Sugerman Shrimp. Honestly, I've had plenty of luck with it in all months. I like a big size 2 or 4 Sugerman when the water is cold, but the air is warm, fished on a floating line. The largest broodstock salmon I've ever hooked took a big Sugerman Shrimp variation. Like the Grape, it's mobile, but the fish will nail it with more authority in the spring, so there is no need for a hook set way in the back. In the spring, the salmon are hungry and a big Sugerman Shrimp looks like a yummy meal. It is definitely one not to be without. 


Brilliant colors, both fish and fly

----------------------------------

     Hopefully this gives you some non-Mickey Finn options, even though the Mickey Finn is as good as any and better than most. Most eastern fly fishers are intimately familiar with this iconic bucktail pattern. The rest of the flies might not be as familiar, especially those tied on tubes. There's no reason to be scared off. All these flies, and many more, can be found in my ebook "Flies for Connecticut Atlantic Salmon: How to Tie and Fish Them," available for both Apple iOS devices and in universal PDF form. Get tying, fall is almost here! 


Monday, April 10, 2017

Deploying the Troops


Headed to the Queen of Rivers, Norway's Alta

     This coming August marks my tenth wedding anniversary. It has been a great ten years. I couldn't ask for a better wife. Due the milestone, I think I'll be on the outside looking in this salmon season.

     My favorite kind of fly tying is tying for a trip. If it's not for my own trip, second best is someone else's trip. After taking a fishing/tying break in January and February, I have been busy tying for anglers taking some interesting trips in 2018. Among the more interesting orders was a dozen Governors, headed for the big, powerful, early June salmon of Middle Camp's pools on the Cascapedia. Another few dozen are headed for the Rivers Tay, Spey, Nairn, and Ness in Scotland. I've  never fished in the UK, but would love to someday. 


Governors for outsized Cascapedia salmon

     The order that got me the most pumped was a dozen tubes, headed to Norway. There are many great Norwegian rivers, but none as revered as the River Alta, home of the world's largest strain of Atlantic salmon. While tying the other orders, I watched some Dave Chapelle specials and listened to a podcast about crime and corruption in Providence, RI (some familiar characters!). While tying Alta flies, I watched Alta videos. Sometimes I stopped tying to give the videos my full attention. I realized that it's a place I need to see at least once in my life.

    Fueled by over an hour of huge salmon videos, I marched into the room my wife was in and declared, "I'm going to start entering the Alta lottery. If I actually win water, I'll figure out what to do later. But I'm telling you right now, one day I'm going to say that I'm going to Norway. It might be next year. It might be fifteen years from now. But it will happen eventually. I have to fish this place before I die."

     She was sort of caught off guard by how abruptly I delivered my "serious" message, but she got it. I think she'd actually like to come along for that trip, which is great. I tried to pitch a tenth anniversary trip to Iceland, but she saw right through it. She knows next to nothing about fly fishing, but I think she understands how this river is different from all the rest. 

Willie Gunns, headed home to Scotland

     I'll probably be living vicariously through some of you guys this season, but that's okay. I still have to tie a bunch of Miramichi flies. It has been a few years since I was last there. Maybe I'll tie a few extra Undertakers and Butterflies for myself. Maybe I can sneak away for a quick trip if the opportunity presents itself...


Cockburn Shrimp for high water on the Miramichi


Monday, March 20, 2017

An Introduction to Tube Fly Tying Tools


The vast majority of my tube flies are tied on either a tapered
needle or a modified hook shank. 

     
     I've received a few questions about tube fly tying tools recently. Instead of writing a new article, I am going to post an excerpt from my ebook Flies for Connecticut Atlantic Salmon: How to Tie and Fish Them. There is a plenty of information about tying salmon flies of all varieties, and not just for broodstock salmon fishing here in Connecticut. In fact, most of the flies are common Atlantic salmon patterns used in either North America or Europe. For those new to tying and fishing tube flies, rigging, tools, materials, fishing strategies, and fly recipes are covered in depth. The text below is a small part of Chapter 1: Tools, Materials & Salmon Fly Anatomy. 


--------------------------------------------------


Additional Tools for Tying Tube Flies

     Since tubes are not held directly in the jaws of a vise, a means with which to hold them is necessary. Most tube fly systems use either tapered mandrels or tapered needles. The taper is important because it prevents the fly from rotating under thread tension. Special tube vises can cost $150 or more. On the other end of the spectrum, objects found around the house might work as well as anything and they don’t cost a penny. I am not going to explain every brand and option. There are books and websites that can weigh all the options for you. Instead, I will tell you what works well for me. I take a sort of “middle of the road” approach. Listed below are the tube fly tools I use on a regular basis.

ProTube Flexineedle

     Tapered Needle - It helps to have a tapered needle with a flat profile. The flat profile helps prevent the tube from spinning under thread tension. My needle of choice is the Pro Tube Flexineedle. There are no additional tools required to hold the needle. It fits into the jaws of any conventional fly tying vise. The Flexineedle works best for medium sized tube flies, both plastic and metal. The vast majority of my tube flies are tied on this $17 item.

Blind eye and modified hooks for tying different size tube flies

     Modified Hooks - When tying very short tube flies, I prefer to use modified hooks. A short tube sits too far back on the Flexineedle to make tying comfortable. A hook shank is much shorter than a tapered needle. It’s easier to wrap thread on a short tube when there isn’t two inches of tapered needle extending from the open- ing of the tube fly. 

     In my experience, the most suitable hooks are large double hooks. Because the wire eventually splits to form both hook bends, a natural taper exists. A tube can easily be pushed back against the taper. Old blind eye hooks work well too, especially large, heavy iron hooks.

     Almost any large fishing hook will work, though. With a Dremel tool, I remove the eye and grind the side of the shank flat. If the hook doesn’t already have a taper built in, I grind one with the Dremel. Also, I cut the hook points off to avoid catching the thread. I had suitable hooks laying around, so these tube tools didn’t cost me anything.


HMH Standard vise with tube vise converter jaws 

      Tube Vise Tool or Converter Jaws - This is the least useful tool of the three, but it is the most expensive. I use the HMH Tube Vise Converter. It is a set of “jaws” that screw directly into my HMH Standard vise. The converter costs $65, but is only useful for those who already own an HMH vise. In lieu of buying new jaws or a dedicated tube vise, the most economical option is to buy what’s known as a “tube tool.” These tools come with pins or tapered mandrels and fit in the securely jaws of most standard vises. They can be usually be found for $20-$45.

     I only use my HMH tube jaws for tying one specific type of fly (the Snaelda/Frances, found in Chapter 4). The HMH converter works perfectly for those flies. If I didn’t need to tie either the Snaelda or the Frances, I would have no use for the HMH jaw. Other than those two flies, all of my Atlantic salmon tube flies are tied on the Flexineedle or on a modified hook shank.

     The only other tools needed to tie tube flies are a lighter (or candle) and a supply of single edge razor blades. If you use a whip finish tool, an extended-reach model is helpful. As you can see, making the leap to tying tube flies doesn’t have to cost much money.

--------------------------------------------------

The Frances and Snaelda (pictured above) are the only flies I don't tie
on either a tapered needle or modified hook shank. 

     As always, don't hesitate to comment below or  contact me with any questions you might have about tying tube flies or anything else. 

Monday, February 1, 2016

Fly Tying Demo and Tube Fly Presentation

Brûlé McSprat (sz. 1.5)
Learn how to tie in the Spey and Dee style at the CFFA Expo


Fly Tying Demo


Expo 2016

Maneely’s Banquet Facility
65 Rye St.
South Windsor, CT 06074

February 6, 2016
9:00am-3:30pm

--------------------------------

An Introduction to Tube Flies: Fishing and Tying


Quinnipiac River Watershed Association
540 Oregon Rd.
Meriden, CT 06450

February 11, 2016
7:00 pm


Monday, January 25, 2016

Undertaker Tube Fly

Simple, quick, and effective

There's not much to say about this one. The Undertaker is one of North America's most popular and effective Atlantic salmon flies. I wanted to tie a large Undertaker, so I decided to tie one on a tube. Instead of a wing, I wanted the hair to wrap around the tube 360º. 

A few hours after tying the first one, this fly proved itself effective. There's nothing fancy about it. Anyone can tie it. Try fishing it on a sink tip or sinking line. 


Undertaker Tube Fly

Tube: 1.8 mm plastic (1")
Junction Tube: PVC, tied directly onto the rear end of the plastic tube
Butt #1: Chartreuse Uni-Yarn
Butt #2: Chinese Red Uni-Yarn
Rib: Oval gold tinsel
Body/Dubbing Ball: Peacock Ice Dub (see notes below)
Wing/Collar: Black arctic fox, tied 360º around the tube (fairly sparse)
Cheeks: Jungle cock (optional)
Head: Black


Tying Notes:

  • I tie the junction tubing directly to the plastic tubing when tying this fly. The overlapping segment of junction tubing is just long enough to be covered by both butts. If junction tubing was placed over the butts, the "hotspots" would be obscured. Since the butts are an integral part of this simple fly, I thought it best to wrap them on top of the junction tube. 
  • Since the junction tube is a permanent part of this fly, make sure you use the most durable junction tubing you can find. Use a fairly long piece of junction tubing in case you want the hook to sit back near the end of the wing/collar. 
  • To see how the junction tubing is tied in, refer to the post linked here. 
  • Wind the dubbed body then wrap the tinsel rib. After tying off and trimming the butt end of the tinsel, form a dubbing ball in front of the body. This will help keep the wing/collar propped up when swimming through the current. 
  • The wing/collar in the fly pictured above is tied 360º around the hook. It's also possible to put the arctic fox in a dubbing loop and wind it around the tube. 
  • Another option is to substitute a couple turns of black marabou instead of the fox fur wing/collar.

Monday, January 18, 2016

Tube Fly Rigging Basics

Fig. I: The standard tube fly rig
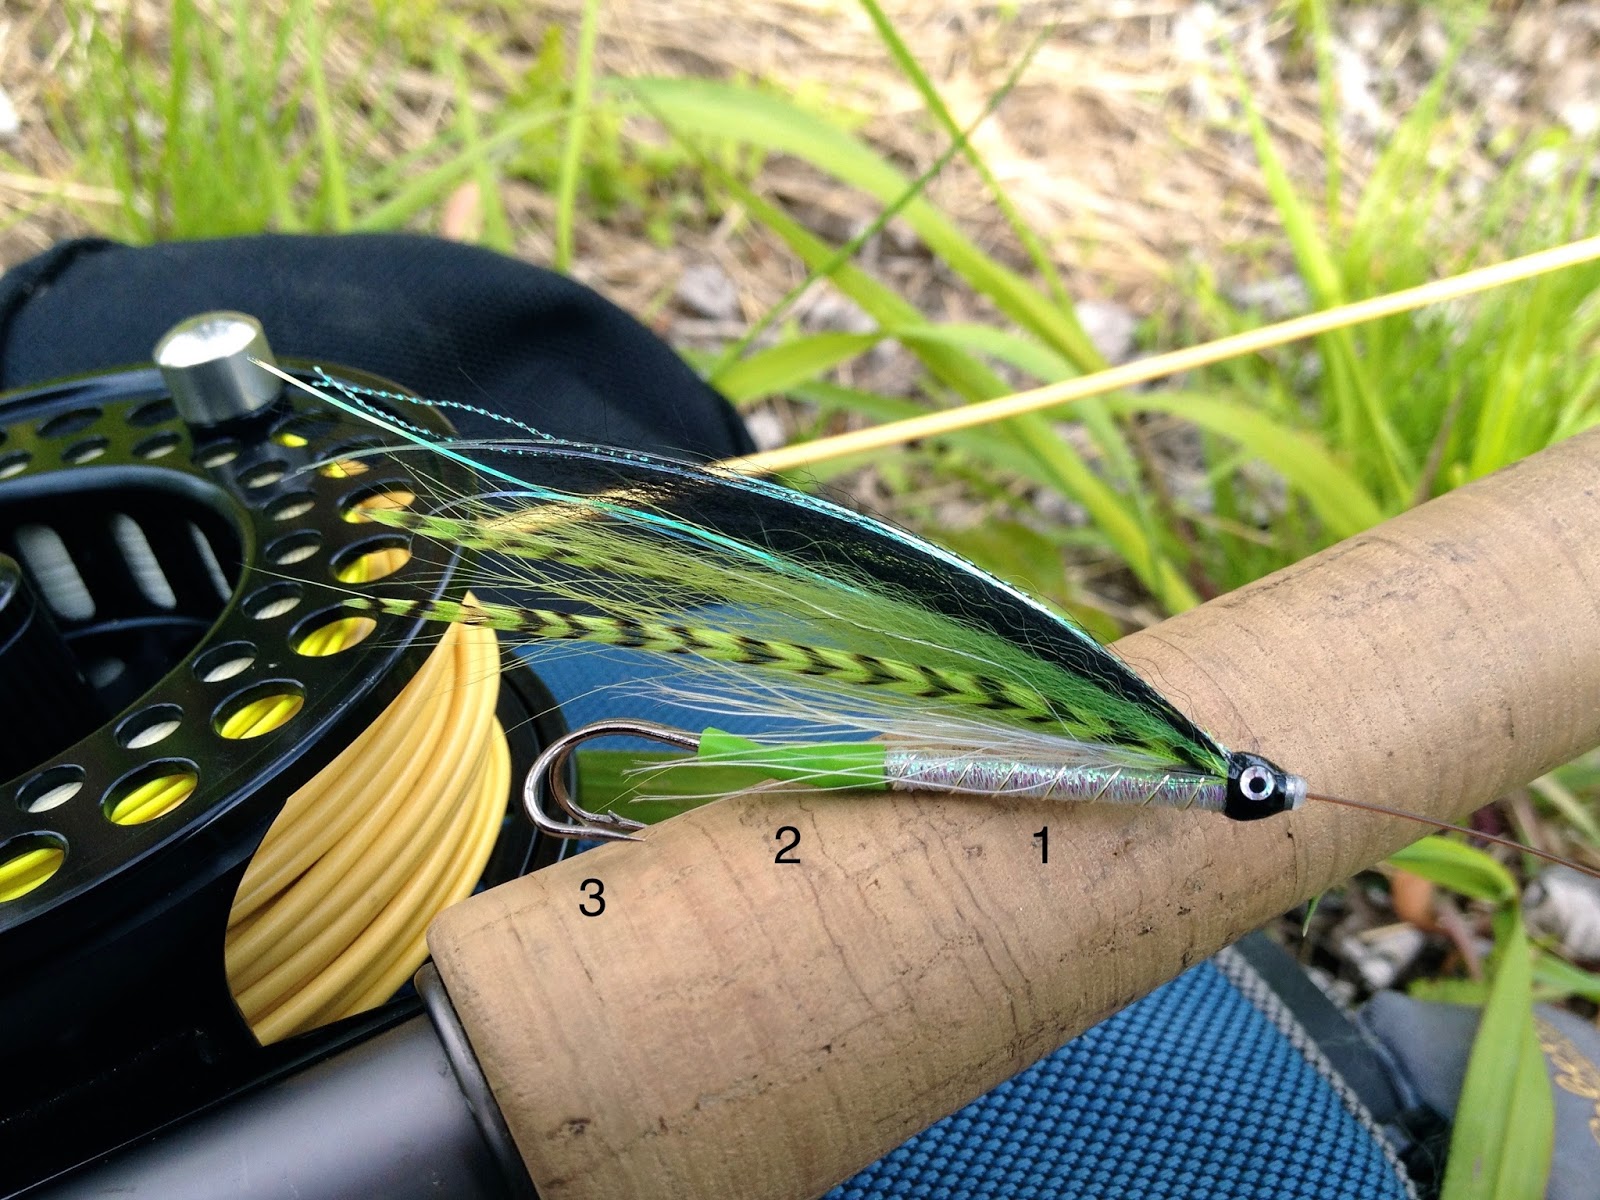
1. Fly tied on a rigid tube (plastic or metal)
2. Flexible junction/hook holder tubing
3. Short shanked hook (single, double, or treble)

Over the past few years, I have given away many tube flies. Most recipients of these "gifts" had never seen a tube fly before. After a reasonable amount of time, I would inquire about the fly's performance. "I never tried it. I don't know how to use a tube fly," was a common answer. Rigging seemed pretty self explanatory to me, but I realized the problem was my own. Tube flies are quite different from conventional flies and I should have offered a little bit of instruction to go along with each of these flies. Hopefully, this post provide some insight on the basics. 

Regardless of how we choose to rig our tube flies, there is one thing each option has in common with one another. The hook is never permanently affixed to the fly. That is perhaps the single biggest advantage to using tube flies (for reasons listed here, amongst other places).  Since the hook is not a part of the fly, we don't need one hook per tube fly. A small assortment of hooks will suffice. 

The most common way to rig a tube fly is by using a flexible junction tubing (aka "hook holder" tubing) that slides over the back end of the tube fly. Junction tubing is most often made from silicone or PVC.  Silicone's best asset is its flexibility. It is my choice when I need to slip junction tubing over a tube fly with a thick body and/or when I use larger hooks. PVC is more rigid and durable. I use it for flies with bare tube bodies, with smaller hooks, and when a longer piece of junction tube is desired. I prefer to add junction tubing after tying the fly so I do not have to fumble with it while on the river. 

To see how this rig works, look at Fig. I. Thread the tube fly (without hook) onto the leader. Let the tube fly fall down the leader. Choose a straight-eyed, short shanked single, double, or treble hook. Tie the hook on with the knot of your choice. I use a clinch knot. After trimming the tag end of the knot, pull the tube fly back towards the hook. Then, pull the hook into the junction tubing. The hook should fit snugly inside the junction tube and the fly is ready to fish. 


Fig II: Hook inserted directly into plastic tube

Some flies are tied on tubes with a large enough inner diameter to hold a hook without the need for junction tubing. This is the case in Fig. II. Thread the fly onto the tippet, tie your hook on, then pull the hook into the body of the tube fly. Note: this will only work with plastic tube flies. The thin plastic tube that lines metal tube flies is too narrow to accommodate a hook. This method is preferable when using hitched tube flies, as shown above. For more information on fishing hitched tubes (and to learn why the tippet is threaded through the side of the fly above), check out this website.

Fig III: Loop knot and free swinging hook

At times, it can be beneficial to fish with hook situated far behind the fly. When the water is very cold, fish can be sluggish, resulting in "nips" or "short strikes." Look at Fig. III. If the hook was placed inside the junction tubing, a fish might not grab hold of it well enough to be hooked solidly. When short strikes become a problem, this type of rig can help. First, slide the tube fly up the leader. Next, tie a loop knot in your tippet. Don't make the loop too big or the hook will end up too far away from the fly. Finally, thread the eye of a short shanked, up-eye hook through the loop. A short length of small-diameter junction tubing is handy to "grip" the knot. If your tippet material is too thick, you won't be able to get it through the eye of the hook. If your tippet material is too fine, the knot might slip through the opening in the back end of the tube, allowing the hook to wind up near (or inside of) the junction tube. If a fine tippet is needed, look at Fig. IV below.


Fig. IV: Loop knot w/plastic bead

Using a small bead can prevent your knot from sliding into the back end of your tube fly. To do this, thread your fly onto the tippet like normal. Then, thread a bead onto your tippet directly after the tube fly. Tie your loop knot, then add your hook, just like the previous example. The bead will butt up against the back end of the tube fly. As long as the hole in the bead is smaller than your knot, the bead will keep the hook in place and the knot out of the tube fly body. 

Fig. V: Standard rig w/extended junction tube

An alternative to using a loop knot is to add a piece of junction tubing that is longer than normal (see Fig. V). For this purpose, I prefer PVC junction tubing to silicone. PVC is stiffer and doesn't flex as much as silicone does. As long as my PVC tubing fits over my tube fly, that's what I use. If silicone must be used, don't fret. Check your fly after sloppy casts to make sure the silicone junction tube hasn't flexed enough to foul the hook on either the fly or the leader.

I find the rig in Fig. V preferable to the loop knot method shown in Figs. III and IV. Both silicone and PVC junction tubing hold a hook more securely than a loop knot. Unless your tippet is thick, a loop knot may cause your hook to droop in slower currents. A longer piece of junction tubing can be used to support the loop but, if you're going to use longer junction tubing anyway, you might as well opt for the method shown in Fig. V. Another reason I like the long junction tube rig is the ability to make changes in hook placement quickly and easily. 

Whichever method is used, it is important to consider the aggressiveness of the fish before rigging up. When the water is warm and the fish are taking aggressively, I want my hook to sit closer to the front of the fly (see Fig. VI). If an aggressive taker grabs a fly with a hook mounted too far rearward, ithe fish might take the hook too deeply. When designing and tying your tube flies, take this into account. A fly with body as long as the materials might not be as useful when the fish are eager to inhale a fly. To make my flies as versatile as possible, I prefer to tie them so they can be used effectively with many types of rigs. 

Fig. VI: The Picasse tube fly with standard hook placement

----------------------------------------------------------

I hope some readers find this post helpful. I encourage you to look at other sources for more ideas. For those of you who might be interested in a more in-depth look at tube flies, their uses for multiple species, and their construction, I offer a presentation called "An Introduction to Tube Flies: Fishing and Tying." I would love to present it at your angling club, fly shop, or event. It has proven very helpful to those who were previously unfamiliar with the benefits of fishing tube flies. Click here for more information. As always, feel free to ask any questions you might have. 

Friday, November 13, 2015

Dirty Water Dog

Happy client, unhappy salmon

Well, it's about the midpoint of the fall Atlantic salmon season here in Connecticut. I'm happy with how things have gone so far. Fall 2014 was the worst in recent memory. Even though the water has been dreadfully low this season, the fish have seemed to be much more aggressive than they were last season. Despite the good fishing, I am sad to signs of the upcoming winter. Most of the leaves have fallen off the trees in my yard. The sun sets early enough where evening trips to the river no longer make sense for me. Though I look forward to catching a big fish on a two handed rod and a copper tube fly, I'm going to miss fishing long leaders and small wet flies.I had today off and originally planned wetting a line. The 20-30 mph winds kept me home practicing music for an upcoming record date (which I should be doing anyway) and catching up on some much needed sleep.

You'll notice a lack of regular reports lately. It's not that I haven't been out on the water, I just haven't been fishing. Guiding has been in full swing and many salmon have been caught. Flies of choice so far have been the Mickey Finn (6 salmon!), the Green Machine, and the Grey Ghost. We even had some success on a subpar day, fishing in high, stained water. When fishing highly colored water, I have the most success with large tube flies. When the river is moderately stained, an Ally's Shrimp is my fly of choice. When it's heavily stained, I use a Temple Dog-style tube fly.

Here is a fly that was successful in very dirty water after our biggest rain of the season. It is essentially an all-orange Temple Dog. I sink the fly and fish it slowly to give the salmon ample time to see it. The Dirty Water Dog is an obnoxious looking fly but, if it saves the day, I don't mind one bit.

This particular color variation is new to me this season, but I have recipes for the original Temple Dog and some of its variants in my ebook "Flies for Connecticut Atlantic Salmon: How to Tie & Fish Them." I did not make a Temple Dog fly tying sequence because the best possible source is already out there.

Click here to watch the creator of the Temple Dog, Håkan Norling, tie his original fly. 

Dirty Water Dog - For fishing the filth
(Note: Only single hooks are legal for CT salmon fishing)

Dirty Water Dog

Tube: Nested 3 mm & 1.8 mm plastic or 1.8 mm plastic w/clear junction tubing
Tag: Oval gold tinsel
Butt: Fluorescent orange floss or Uni-Stretch
Tail: Hot orange Fluoro-Fiber
Rib: Oval gold tinsel
Body: 1/3 Holographic gold tinsel; 2/3 UV orange Ice Dub
Body Hackle: Hot orange rooster saddle
Throat Hackle: Orange hen saddle
Wing 1: Hot orange arctic fox with gold Angel Hair
Wing 2: Orange arctic fox with gold Flashabou
Wing 3: Orange snow runner with gold Angel Hair
Cheeks: Jungle cock
Head: Black or conehead (optional)

Note: If I plan on using a conehead, I do not weight the fly. If I don't use a cone, I wrap a layer of lead tape around the tube beneath the space allotted for dubbing. 


Light and dark versions