Ian Gordon - your host on a tour of Scottish salmon rivers
It took longer than normal for the annual holiday binge/purge cycle to go away this year. Last night, I finally had enough of it. I decided to dig out my running shoes and dust off the treadmill. I hate the treadmill. I don't really like running outside, either. I always preferred playing a sport to running. I miss living near the beach and going surfing. I've been considering getting my tennis skills back together this summer and possibly joining an indoor tennis club next winter. Anyhow...
The treadmill is much more pleasant when I have angling videos to watch. I've been aware of Ian Gordon's movie Blue Charmfor a while, but never saw more than the trailer. Last night was as good as any to watch it, so I found it streaming on fishingtv.com.
Based on the trailer, I knew I would see beautiful footage of Scottish salmon rivers. The movie did not disappoint. I got a good look at the Rivers Dee, Spey, and Findhorn. At 84 minutes, Gordon's movie is a combination of history lessons, interviews, fishing strategy, and traditional spey casting instruction. Gordon even demonstrates fishing with an antique 15' greenheart rod, which was particularly interesting.
In the past, Scotland was never at the top of my list of salmon fishing destinations, but I have been reconsidering it. The beauty of the landscape and the wealth of angling history is starting to push Scotland near the top of my list (Iceland is still #1). Watching Blue Charm reinforced this my changing opinion. With the USD to GBP exchange rate still favorable, the gears in my mind are turning.
I'm glad I rented this movie and didn't purchase it. I'm not sure how often I would rewatch it. However, the DVD would be a wise purchase for a beginning Atlantic salmon angler. Gordon covers the rudiments of Atlantic salmon fishing in a way that is easy to understand, yet still entertaining. In my opinion, the best part was how he broke down pool coverage. Sometimes the longest cast isn't the best cast!
In all, it was about as enjoyable as a treadmill workout can be. Every fly angler should watch this at least once. For those who are curious about or just beginning to fish for Atlantic salmon, I recommend buying the Blue Charm DVD and watching it a few times. After some time watching Ian Gordon present the basics, DVDs with alternative/advanced strategies (i.e. Henrik Mortensen's Fly Fishing Academy series) will makes more sense.
In Part I of this short series, I demonstrated how to tie my standard, bread and butter shad fly. It is a simple, effective, and easy to tie pattern. In addition to that fly, I have a few other patterns I like to use. However, before I describe the others, let's take a look at some shard darts, the standard lure used for American shad fishing.
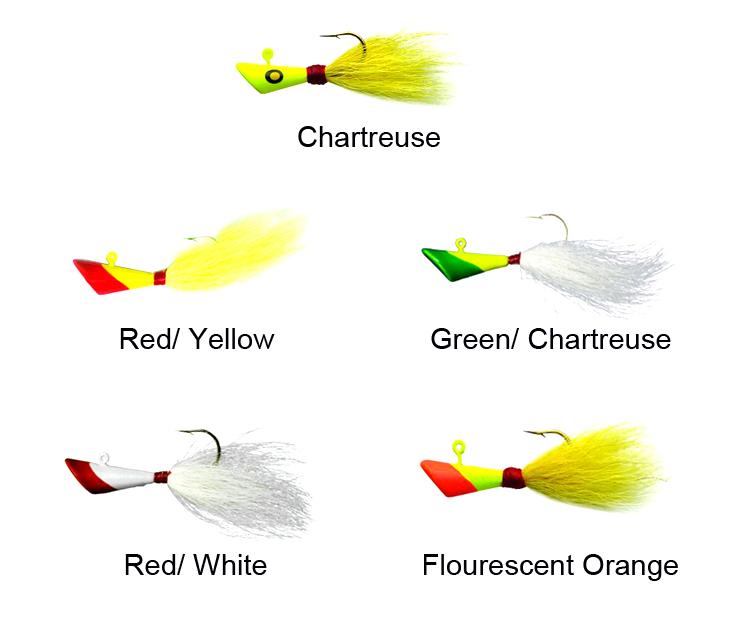
A seclection of Eagle Claw shad darts in common color schemes
Shad darts and willow leaf spoons are the most widely used lures for American shad fishing. While willow leaves have no relation to flies, most darts involve a small degree of fly tying technique. Many traditional darts have a contrasting color scheme which can be easily replicated when tying shad flies. Darts, most often made with lead, can vary greatly in weight, from 1/64 oz up to 3/4 oz or more. The smallest darts can be used with a fly rod. The largest darts can put a hole in someone's head!
Mike Taylor shad dart
In addition to being a great fisherman, my friend Mike Taylor ties some excellent tin (non-toxic) shad darts. The dart pictured above is tied in form of a traditional dart, but with some modern touches, such as Krystal Flash and glitter paint. Mike's darts are well constructed and very durable. Most importantly, they are excellent fish catchers. Notice how Mike's darts are tied on light wire, gold jig hooks.
Mike's "no frills" mini darts
Mike gave me a couple of his mini darts last season when I needed to get down quickly. The red one (pictured above) caught a shad on its first cast. With no additional materials to slow down their descent, these mini darts are great sinkers. They also work well when shad nip at the back end of a traditional dart or long-tailed fly. This type of dart could easily be converted to a fly by using tungsten cone headsand tiny bit of material to hold it in place. A more esoteric option would be to use undressed bottle tubes, such as Shumakov Long Range or Skittle tubes.
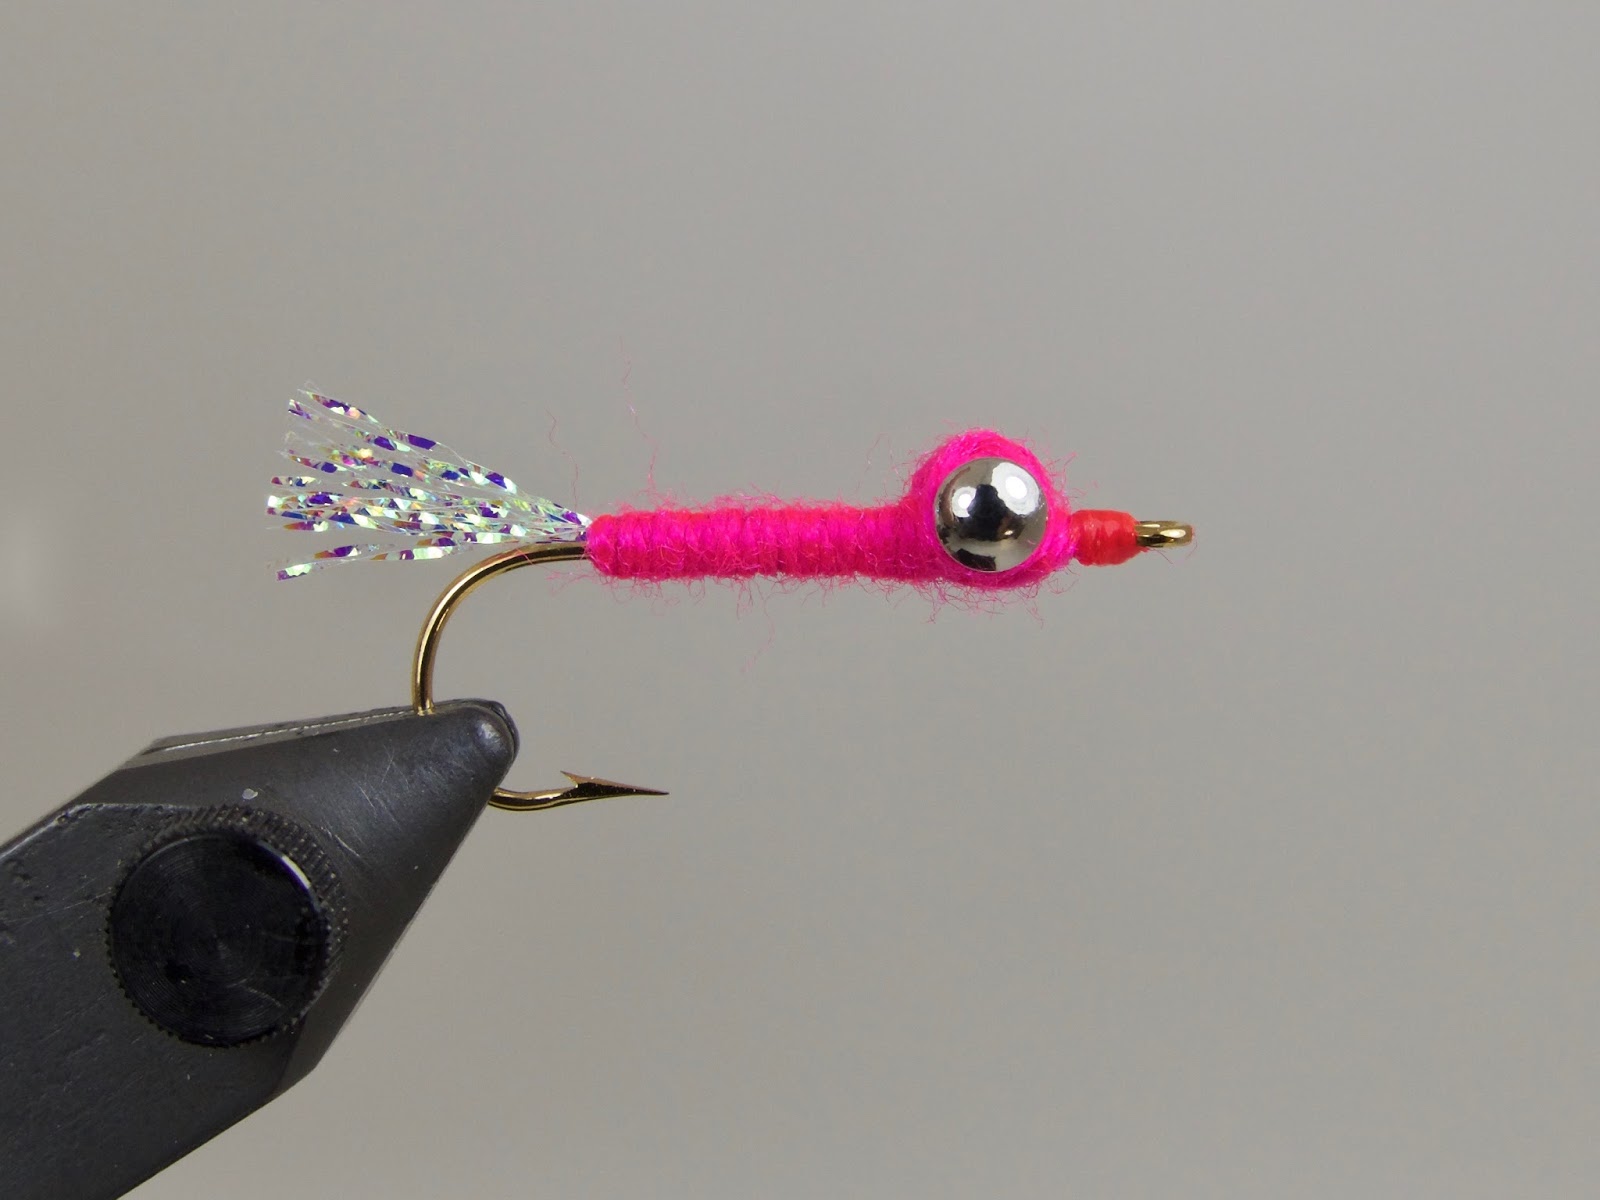
My standard, bread and butter shad fly
The pink fly above is my basic pattern. This was the pattern shown in last week's step-by-step tutorial. My favorite colors are fluorescent orange, pink, green, blue, and red. They can be tied in bulk in next to no time at all.
The bread and butter fly, tied "low water" style
Sometimes shad get "nippy," grabbing onto the rearmost part of a fly or dart. This happens often near the end of the run. It can also happen during severe weather/pressure changes. When shad refuse to commit, I switch to a pattern tied in the Atlantic salmon "low water" style. Basically, I tie a fly one size smaller than the hook I am using. In the picture above, I tied a size 6 fly on a a size 4 hook. I usually tie a short tail. In this case, the tail doesn't even extend past the bend of the hook. I haven't tried omitting the tail entirely but, if Mike's mini darts work, I don't see why a tailless fly would not.
Another option is to trim the tail on flies and darts. If possible, cut the material back to a point shy of the hook bend. Even if the shad doesn't grab onto the whole fly, hopefully it will get the business end of the hook in its mouth. Sometimes shad absolutely cream a fly, sometimes you'll barely know a fish is on. Be aware of those little taps.
UV resin shad fly
When I want a tiny bit of extra weight, I use a fly coated with Solarez UV cured resin. Honestly, until I weighed the flies, I thought the resin added more weight than it actually does (refer to the table below). It's sort of like going up one size of brass eyes without actually going up one size. I'm not sure it makes that much of a difference. This fly takes about twice as long to tie as my standard pattern. Despite the extra work, the blue version of this fly was an absolute killer for me last season, so now I'm afraid not to have some with me at all times.
This is essentially the same fly as the one posted in last week's tutorial other than the body. Instead of wool yarn, I make a tapered underbody with Uni-Stretch, then wrap over it with Veevus holographic tinsel. The tinsel is slippery, so wrap carefully and under sufficient tension. After whip finishing, apply a coat of UV cured resin to the entire fly. I coat it all the way up to the head.
Beadhead shad soft hackle
When the water is low, the fish are heavily pressured, or both, I opt for a small bead head soft hackle wet fly. This fly has been very good to me. The toughest, most memorable shad I ever hooked was caught on the pink and yellow wet fly pictured above. Though I tie these on standard wet fly hooks, I would like to try the jig-style nymph hooks to keep the hook point riding up. Here is the dressing:
Bead Head Shad Soft Hackle
Hook: Mustad 3399A or equivalent (sz. 8-10)
Bead: Brass or tungsten (1/8"-5/32")
Weight: Non-toxic wire
Tail: Hackle fibers or Krystal Flash
Body: Fluorescent wool yarn
Thorax: Ice Dub (to match tail)
Hackle: Hen neck (to match tail)
Head: Ice Dub (to match tail)
Favorite color combinations (body/hackle): pink/yellow, orange/green, orange/yellow, green/darker green
Tandem rig, the top fly a variation on the basic pattern (chenille head)
I have been using sinking Scandi heads to get my flies down and to help keep them in the zone longer. It has worked really well so far. However, there are times when I prefer to fish with a single handed rod, floating line, and mono leader. When I feel like I need more weight to get down with that rig, I use a long leader and two heavy flies. This has gotten me into the zone and into fish when one fly just wasn't cutting it. Tandem rigs are also good to see if the shad are keying in on one particular color or size of fly. I've had great success with the combo pictured above. I the larger fly seems to get the smaller fly into the strike zone. Some shad take the big fly, but most seem to grab the soft hackle.
Size/weight chart for the flies featured in this post (click to enlarge)
Sometimes I get curious about how much flies weigh, so I use my handy little scale. I weighed all the flies and darts featured in this post (with the exception of the Eagle Claw darts). I prefer to weigh in grams since it's easier to compare light weight flies than when using ounces. As stated above, I was surprised how little weight the UV cured resin added to the fly, though purely by coincidence, it moved proportionally with the increase in brass eye sizes. It also weighed slightly more than my heaviest dart, which also surprised me. Some flies were too light to register on my scale, but I don't concern myself with weight when I'm fishing flies that small.
Besides the non-toxic wire used on the soft hackles, the only metal I used was brass. Tungsten would make for much heavier flies. Heavier flies might require using heavier tackle, which might make a 2-6 lb fish less fun to catch. Overall, I am happy with the size and weights of these flies, particularly when sinking lines, heads, and tips get the flies down well enough.
I hope this post helps some of you. Shad are an often overlooked local gamefish. If you tied a fresh American shad and a comparably sized trout tail to tail, the shad would drown the trout in a heartbeat. Fighting a big, tough roe shad can be very exciting, especially on appropriately sized fly tackle. Give it a shot this spring!
What I enjoy most about the spring fishing season is its diversity. Spring is a time when unrelated species of anadramous game fish cross paths with each other as they travel upriver. At sea, however, they are scattered all over the Atlantic. American shad migrate to the Bay of Fundy in eastern Canada. Atlantic salmon migrate to the feeding grounds around Greenland and the Faroe Islands. Striped bass head north from Chesapeake Bay. I have no idea where our alien sea-run brown trout go, but I imagine they stay fairly close to home. The one thing they all have in common is the last leg of their respective journeys. Spring is a time when an angler might not know what is on the end of his or her line but, if it is fresh from the sea, chances are it will be an exciting battle.
The past couple of seasons, American shad fishing has caused me to put my normal routine on hold. The Connecticut River run has been around 300,000-400,000+ shad the past couple years, which is significantly more fish than the rest of the spring gamefish run combined. After a long winter, it can be nice to catch a lot of fish. A lot of hard fighting fish, as the case may be. Enough fish to decimate a fly box if an angler isn't careful. Shad don't have teeth, but catching twenty, thirty, forty, or more, in a day will destroy flies. If the fish don't wreck them, the bottom will, since most shad like a fly presented low in the water column.
As such, it doesn't pay to spend much time tying shad flies. The fish aren't too picky. They're not eating. Even if they were, they feed on plankton, which is much smaller than our flies. They seem to lock into certain colors at times, so I like to tie a few different flies in several different colors. When the water is low, I like to fish a small beadhead softhackle (tied in psychedelic color schemes). When I need to get down quicker, I use a fly with a UV resin body to sink quickly. My bread and butter fly, the simplest of them all, is the subject of this post.
There are many step-by-step fly tying tutorials out there. What I want to focus on here is the reasons why I have made the decision to use certain materials or techniques. Some of the reasons may be obvious, some may not. Since this generic fly template is an easy tie for all skill levels, I hope the reader will key in on why decisions were made in addition to how the fly is constructed.
The killer fly, tied in Chinese Red
This is why it pays to use easy, inexpensive flies.
Simple Shad Fly
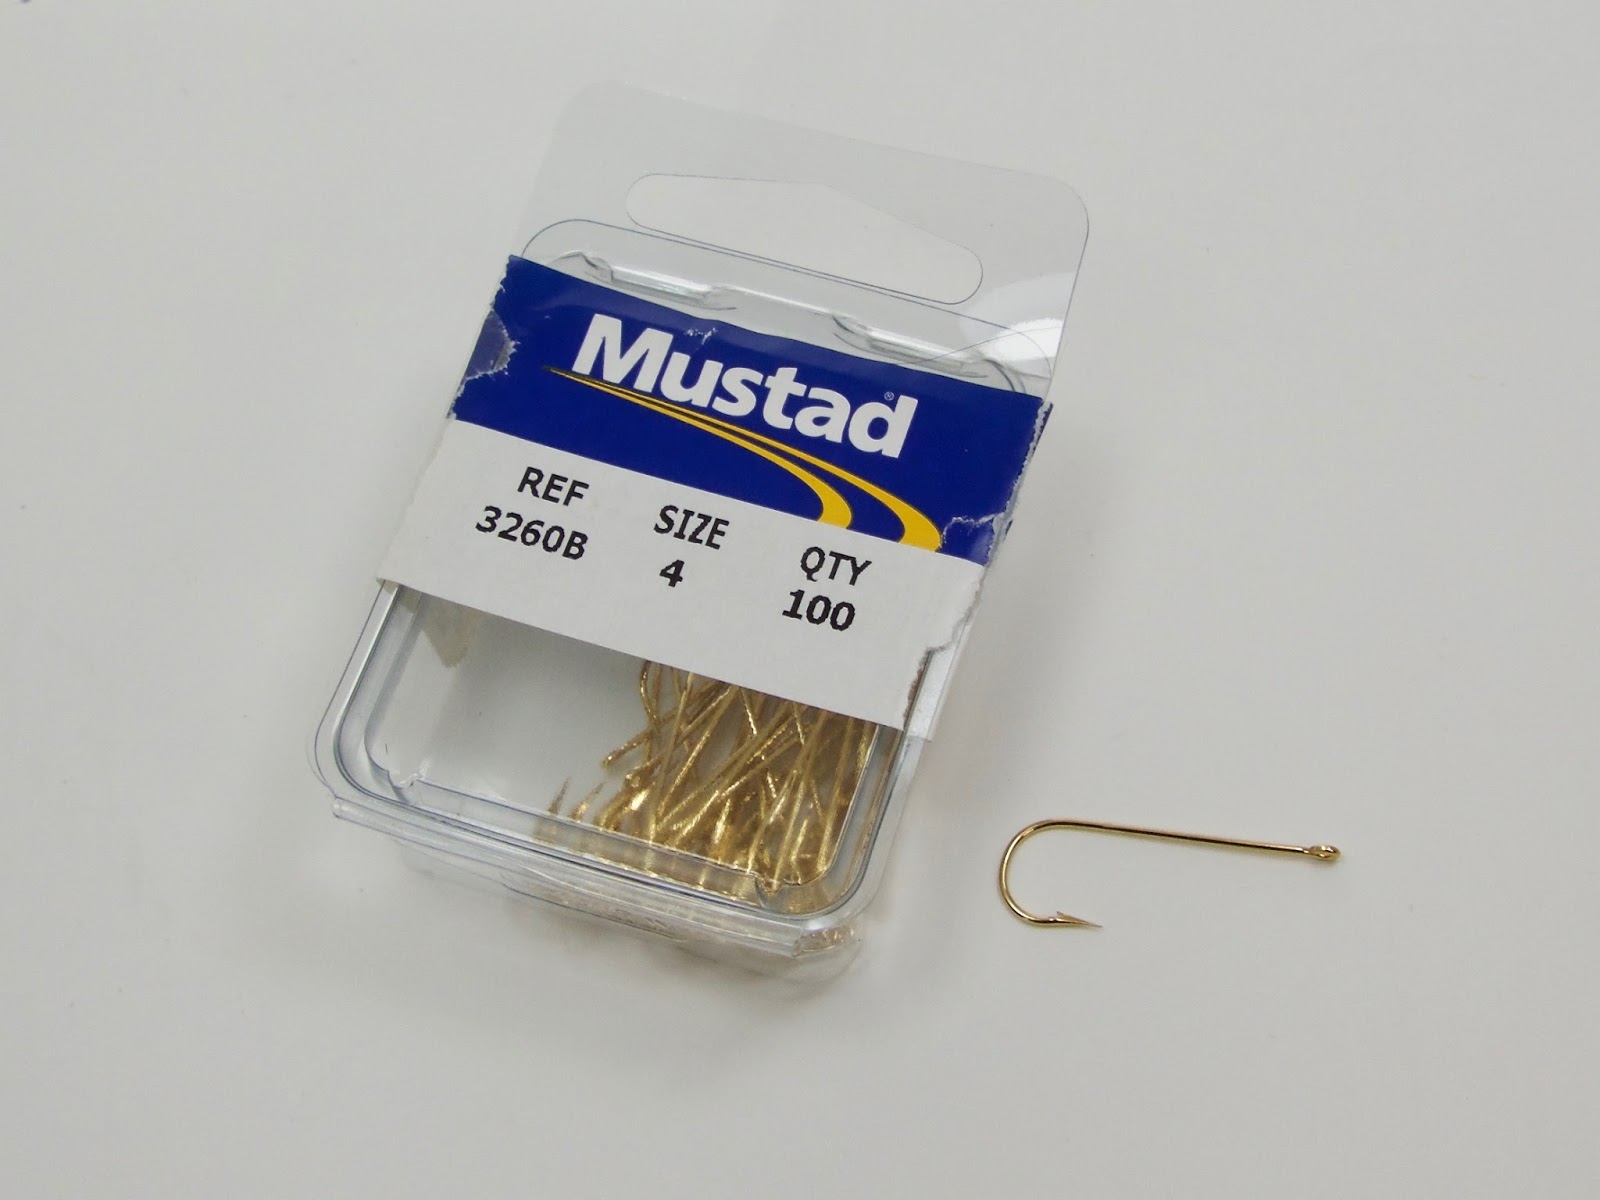
Hook: Crappie/panfish hook- light wire, gold, Aberdeen bend (i.e. Mustad 3260B or Eagle Claw equivalent); sizes 4-8
Fig. I: When it comes to hook choice, I take my cue from those who tie shad darts. Darts are often tied on light wire, gold, crappie/panfish hooks with an Aberdeen bend. Shad often lie close to the bottom and/or in rocky areas. When a very light wire hooks hangs up, a tug or two will usually bend the hook and free it from the snag. With a pair of pliers or hemostats, the hook can be bent back very easily. Another reason to use these hooks is the "flex factor." Shad have very thin, fragile mouths. When they pull on a tight line, the hook flexes a bit with the tension.
Fig. II: Making a thread bump
Fig. II: I like a heavy thread with which to lock down the thick brass dumbbell eyes. Making a little ant-shaped thread bump helps keep the eyes seated correctly when tying them in.
Fig. III: Adding brass dumbbell eyes
Fig. III: Similar to the Clouser Deep Minnow, dumbbell or bead chain eyes are added to the top of the hook shank to force the point to ride upwards, thus helping to avoid snags. These heavy eyes also help to sinker a fly quicker. On a size 4 hook, I use either 3/16" or 5/32" eyes. On a size 6 hook, I use 1/8" eyes. On a size 8 hook, I use either 3/32" brass eyes or small bead chain eyes.
When tying in the eyes, use a figure eight motion to lock them in. After they are seated, I like to use a lot of thread tension to keep them in place (hence the 3/0 thread). I pull as hard as I can without breaking the thread. After the eyes are tied in, I add a drop of super glue to the thread. After catching a ton of fish, the eyes will eventually move around. The goal is to keep them firmly in place for as long as possible.
If you are tying a lot of shad flies at one time, it makes sense to tie up to this step, then place the hook aside and wait for the glue to dry. I usually pre-tie a bunch of eyes and keep them in a compartment-style fly box. When I need a certain color fly in a certain size, I take the eyed hook out and the rest of the fly can be finished in a minute or so.
Fig. IV: Laying down a thread base
Fig. IV: Lay down a base of thread for your tail material. If I am tying on pre-assembled eyed hooks, I usually switch to a smaller size thread to finish off the fly.
Fig. V: Adding a short tail of flash
Fig. V: Color contrast is a staple in many shad darts. Often times, a bright color is offset with a white tail. For the tail of this fly, I like to use pearlescent Crystal Mirror/Electra flash. The pearl color contrasts well with the body of fluorescent wool. Crystal Mirror flash is like Krystal Flash on steroids. It's thicker, shinier, and really throws off a lot of light.
Since it is common for American shad to nip at the rear end of a fly, I like to keep my tails short. I don't tie them any longer than in the fly pictured above, and often times I tie the whole fly shorter. To tie it "low water style," start the body just above the hook point and cut the tail flush with the bend of the hook. As much as possible, I try to avoid the shad grabbing the rearmost part of the fly without grabbing any of the hook. A fly tied a bit undersized for the hook helps prevent the nipping.
Fig. VI: Tying in wool for the body
Fig. VI: I like to use wool yarn for the body of this fly. It absorbs water and tends to get buggier looking as the fly gets chewed on. My favorite yarn is Danville's fluorescent nylon wool. The colors are spectacular for shad flies. I like their fire orange, green, blue, and fluorescent red (pictured here, which is really more like fuchsia than actual red). Since Danville doesn't make a real red color, I use Chinese red Uni-Yarn instead. It is a truly deadly color.
Fig. VII: The completed shad fly
Fig. VII: Wrap the yarn up the hook shank and figure eight the yarn around the eyes several times. Tie it off, whip finish, and add head cement. Sometimes I tie two whip finishes and skip the cement. If desired, a contrasting fluorescent color can be used for the head. Just make sure the thread color lighter than the color of the body material so it doesn't show through when the fly gets wet.
Happy belated New Year! I want to start 2017 off with a video that might be helpful to some. I've received a few questions about tying various Atlantic salmon stonefly patterns. There's no mystery to it, as you will see in the video above. I have my own way of doing things that differ slightly from Todd Cochrane's original dressing for the Ghost Stonefly. My way isn't any better or any worse, just the way I like to do it. As always, feel free to ask any questions you might have.
I've said it here before. I'm usually not on the cutting edge when it comes to buying the newest tackle. I can't afford to be! I fished with two Sage One series rods this year, a 9' 7 wt. and a 12' 6" 7 wt. I know the Ones are several years old, but they are the nicest rods I've ever owned. I was able to unload a lot of gear this year and I picked up a lot of gear at very good prices. The trick is to not be in a hurry and to wait until the right thing pops up used or on sale. Also, buying gear from Canada (with a very favorable exchange rate) saved me an awful lot of money.
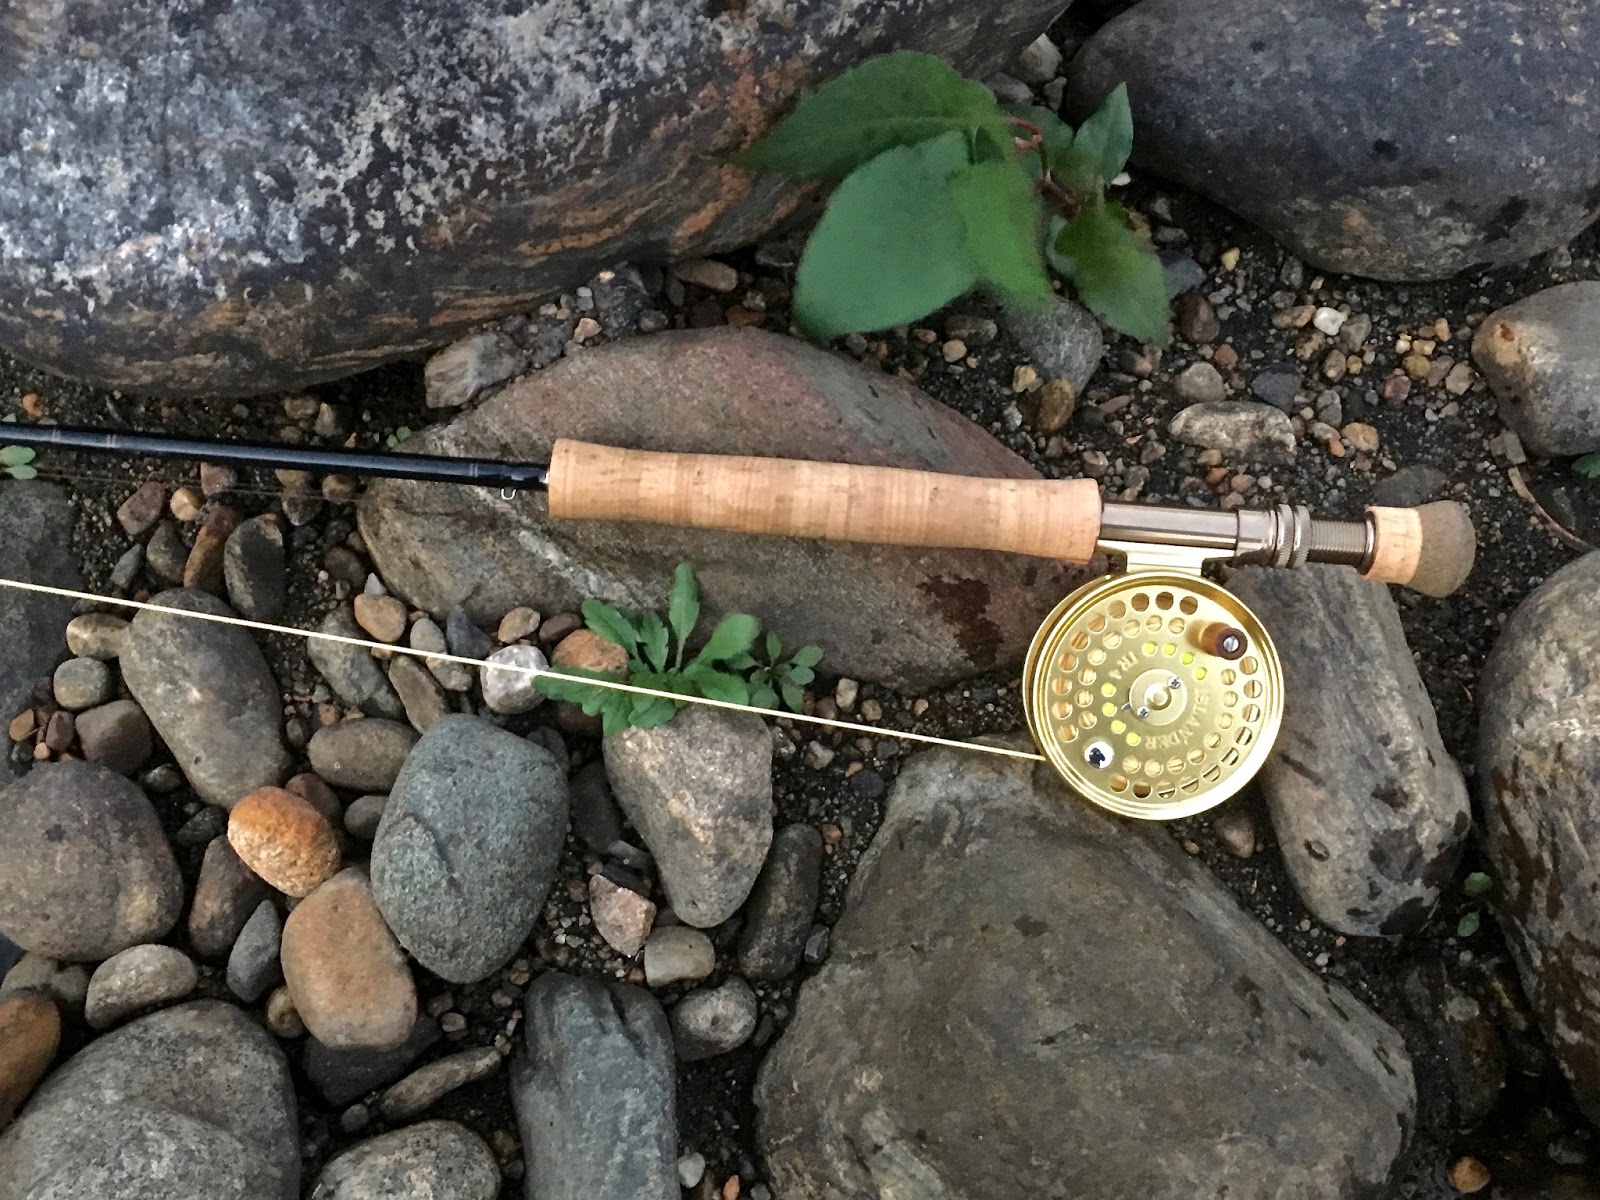
The Sage One 790 was a closeout demo model from a local fly shop, UpCountry Sportfishing. At first, I checked it out and decided to pass. Trout fishing was slow that afternoon and I kept thinking about the rod. I wound up driving back to the shop, trading in my old Echo 4106 switch rod, and walking out with the One. My old Sage Graphite II rod is getting long in the tooth, plus I wanted a 7 wt. that would work well with my favorite reel, the Islander IR4. The One and the IR4 balanced well together. This combo is so much lighter in hand than my old 7 wt. outfit. It throws laser loops, but I feel like I have been fishing a 5 wt. trout rig all day long.
I was afraid we wouldn't have a salmon season in CT this fall, so I took the rod out for an evening bluefish blitz. I didn't use the IR4. That would have been crazy. I burned out a pawl during the spring American shad season. Bluefish would have destroyed the reel (and my hands). Instead, I used an Islander LX 3.6. Fortunately, it wasn't too windy for a 7 wt. The rod was a little underpowered for bluefish, of course, but it sure was fun. I probably caught two-to-three times as many blues in one night as I did all my salmon this fall. The rod is a keeper, though I just tried the same model Sage X one of my clients happened to buy, so...
Sage One 7126 and Danielsson L5W 8twelve
I acquired my Sage One 7126 in a straight trade for my TCX of the same size. Though technically I got this rod in 2015, I didn't really use it until a trip to Canada in June 2016. What a rod! It's so light, it felt like I was using a switch rod. Goodbye fatigue. Paired with a Danielsson L5W 8twelve, a 480 gr. Rio Scandi head, and a Rio GripShooter running line, the combo performed admirably, landing salmon up to 15 lbs. I really like having a downlocking reel seat again. I wouldn't mind having a larger, more robust version of this rod, maybe an 8136 or a 9140.
Redington CPX 9139 and Loop Classic 8-11
Fighting a fish on the Cascapedia's Lake Branch
I bought an inexpensive used Redington CPX 9139 in case I needed a beefier combo. I paired it with a borrowed Loop Classic 8-11. I wasn't too crazy about this pairing. It felt too clunky and it was tiring to cast. Also, I'm not crazy about classic style, S-handle reels. I suppose I'm glad I have this rig though, just in case I need it. Like I said above, I wouldn't mind replacing it with something like a comparable One or an X (and a different reel), but I'll worry about that the next time I plan on fishing a river with large, early season salmon.
Beulah Platinum 590 and Abel TR2
I replaced some trout fishing gear this year too, which was long overdue. For many years, I fished with an Echo II 9' 5 wt. rod. It always felt too stiff. It had no feel. Since most of my trout fishing is with dry flies, I like a rod with a more moderate action. I picked up a closeout Beulah Platinum 590 for a song. I paired it with an Abel TR2. I would have preferred to pair it with an Islander IR3, but I didn't find one in time (I wound up finding one later and paired with my Orvis TLS 4711). Anyhow, I like the Abel TR2 a lot. I wish the drag was adjustable from the outside but, other than that, it's a really terrific reel. The Beulah rod was just what I was looking for. It has way more feel than my old Echo. It's a very nice dry fly rod. My main trout fishing setup is a 4wt., so I didn't use this 5 wt. rig as much as I would have liked to. I caught my personal best dry fly trout with it though, so I can't complain!
After losing a piece of my Ross Reach 7119 during shad season (then being reunited with it), I decided to get another. I never found one for a good price, so I bought a Ross Reach 6126 while they were on closeout at Sierra Trading Post. This was back when there were still 35% and 40% off STP coupons. The 6126 throws the same lines as the 7119, so I'm safe in case anything happens to one. I never got a chance to try it, so it will have to wait until next spring. It's a shame Ross Reach rods are no longer made.
I picked up a couple of inexpensive reels, too. I found an old Scientific Anglers System 10 (same as Hardy Marquis Salmon 1) and paired it with my Sage Z-Axis 6110. I wish I had a chance to use it more, but I'm sure it will get a workout next spring. I also got a cheap, used Orvis Battenkill IV as a backup for my Abel Classic Switch. It seems like an ok reel. It's definitely not as nice as the Abel, but it is a lot less expensive. The click drag is a little too tight, so I fiddled with the spring to loosen it up. Next shad season, I'm planning on keeping a different density line on the Abel, Orvis, and SA reels, then bringing two rods with me to make experimenting with depth easier.
It sounds like a ton of gear, right? I have all the drum gear I need, plus I was good about selling an item of fishing gear almost every time I bought a new item. Like I said, I had to wait for my price on a lot of items, but I saved money in the end (as much as possible when spending it on this silly stuff). I don't have much more gear than I had at this time last year and my wife is none the wiser!
Other Gear
Patagonia Foot Tractor Wading Boots...don't use on wood floors!
This was the first full season I used my Patagonia Rio Gallegos zip-front waders. I got these at the very end of last season, so they are the previous generation. They are very roomy up top, but that made them perfect for cold weather layering. I was very impressed with how comfortable they are. The Rio Gallegos are much more comfortable than my old Simms G4 Pro waders (stiff). Sometimes I forget I'm wearing waders. Time will tell if they are as durable as the Simms but, at the moment, I much prefer the Patagonia waders. I will probably buy a new pair of the current generation Rio Gallegos next year. Supposedly, Patagonia refined the fit so they aren't as baggy as the old ones. I'll save the old ones for late fall through early spring and use the newer model throughout the warmer months. I am really glad I made the switch to Patagonia.
I just got a pair of Patagonia Foot Tractor wading boots a couple of weeks ago. So far, I like them almost as much as the waders. I have always been a felt boot fan, so I was a little skeptical. Man, those aluminum bars grip! If I had them a week sooner, I might not have fallen onto those rocks, bashed up my left leg, and tore a calf muscle. Sometimes I feel the bars slide a tiny bit, then they catch. They are much easier to get on and off than my old boots, which is a plus. My complaints are minor. They are sort of heavy, so I will probably use other boots for long hikes. Also, I wish they drained a little better. They grab hold of the bottom so well, it's easy to forget those two things. The Patagonia Foot Tractor wading boots will get their real test in the spring when the American shad, striped bass, and seatrout ascend their gnarly rivers.
Fishpond Nomad El Jefe net with a nice landlocked salmon
Last season, I left my Fishpond Nomad mid-length net on the roof of my car, only to have it fall off and get crushed by an eighteen wheeler. I was bummed. It was a little too small for my needs, so it was the perfect time to replace it with the Fishpond Nomad El Jefe net. The El Jefe is a little longer than the mid-length net and has a slightly larger, deeper basket. Otherwise, it is pretty much the same great wading net as my last one. It also doubles as my wading staff. The largest fish I fit into the El Jefe was about 28". That salmon had to be "folded" a little. I don't think it would work for a fish much longer than that. As a sidenote, the El Jefe didn't fit into my Smith Creek net holster as well as its predecessor did. The El Jefe slid around too much. I'm going to go back to the drawing board on this one and figure out a solution in the spring.
In addition to making great products, both Patagonia and Fishpond should be commended on their ethical business practices and their commitment to keeping our environment as pristine as possible. If you have a moment, click the following links to read more about the respective corporate responsibilities of both Fishpond and Patagonia. I am very grateful to be affiliated with such socially responsible companies.
At long last, a double-sided Tacky fly box!
I'm a big fan of Tacky Fly Fishing's fly boxes. When I get the periodic Orvis $25 off $50 purchase coupons, I use them to buy hooks. I had just received a coupon in the mail and was looking at the Orvis site when I noticed their joint venture with Tacky. Double-sided Tacky boxes! There is one with the normal Tacky slit material on both sides. The box I bought has the normal material on one side and the Tacky Big Bug slits on the other. I could finally cram almost all of my broodstock salmon flies into one Tacky box. Plus, with the coupon, it was pretty inexpensive.
---------------------------------
Well, that's it for 2016. Thanks again for reading and I appreciate the feedback. Let's hope for more water in 2017. Have a happy New Year!
It was a short fall, but not without its highlights.
This was definitely a strange fall. With water levels at historic lows, we were lucky to have a salmon season at all. I'll admit, I was not optimistic. I canceled my guide insurance policy in early October only to request it be rewritten a few weeks later. This was the first season I guided significantly more hours than I fished. Once the season started, I had only a couple of days to get my bearings before my first trip. After that, it was a whirlwind of activity until Thanksgiving weekend.
The ultra low water made the salmon behave in ways I wasn't used to seeing before. When river was at its lowest levels, the fish seemed to favor depth over all else. If they could have moving water too, that was preferred. If the moving water was too shallow, they seemed to hide out in any deep depression they could find. A lack of rain stalled their usual movement into the secondary pools. The few times it did rain, fish moved out quickly. Since we had a low number of salmon in the river this year, they became harder to find once they spread out.
I figured we might have epic dry fly fishing given how low and clear the water was. This was not the case. It was the first fall in a while I haven't at least moved a fish with a dry fly. I think they were too freaked out to come up, though maybe I just had bad luck. I don't think I tried fishing a hitched fly at all this season.
Luckily, the salmon were still happy to take wet flies. As the water dropped, our flies got smaller and smaller. After watching several people lose fish on larger flies, I switched to flies tied on very fine wire hooks. It worked and the vast majority (90%!) of the fish either my clients or I hooked were landed. In the lowest water, a size 14 Mickey Finn did the trick!
The infamous sz. 14 Mickey Finn
I had several clients hook, land, and release their very first Atlantic salmon. That is always exciting for me. A couple of them said it was the largest fish they had ever caught on a fly. I was very happy to be a part of that. It is one of the highlights of the job.
I guided two clients into the same fish in the span of nine days. The salmon had a very distinct tail. The first time I saw it was in an unstocked pool in Naugatuck on November 8. Six days later, we had enough rain to move fish around. The salmon turned up again, this time in Beacon Falls, on November 17. It moved about five miles on one relatively small bump of water. Assuming it hasn't already been eaten, that fish is probably in the Housatonic now. Practice catch and release so others can enjoy the sport!
The fishing seemed to slow down as we got into late November. I pinpointed some salmon in a pool that is very difficult to fish with a fly. Unfortunately, my unorthodox presentation experiments didn't pay off. I have some ideas for next year, though.
As always, there were many anglers who refuse to follow rules. Some of them seem legitimately ignorant of the seasonal regulations. Others just don't care. There is a definite lack of signage on the river, especially pertaining to salmon season. Because of this, some conservation officers let people off with a warning instead of fining them. If there is no fear of consequences, what is stopping offenders from breaking the rules again? I'm getting pretty sick of this and I am going to write letters and emails over the winter. It is time to be proactive. The squeaky wheel gets the grease and I plan being very squeaky. If I have to, I will print my own signs, bring a ladder, and hang them up around the river.
This guy put on a show his first day of salmon fishing!
I used a two handed rod less this season than in any other season since I started fishing with one. There just wasn't enough water for it. Fortunately, I got some time with a switch rod at the end of November and the beginning of December. I sure do miss the good old days of normal water levels and fishing with a two handed rod.
The last day I fished was December 8. I went out for a couple of hours, but had no luck. Last year, fishing was productive into January. That was a lot of fun, but the warm temperatures were the main reason why our season was so short this year. I guess it balances out over time, at least hopefully it does. The cold weather came the second week of December. If these fish fought like fresh springers, I would go throughout the winter. They get too lethargic for me to bother, so I felt okay hanging it up early. I had the best action I'm likely to get and I'm satisfied with how the season went. I might give it another shot if we have a warm stretch in the winter or spring. We'll see how bad cabin fever gets...
Ally's Shrimp caught the lion's share of my own salmon this fall.
Top Flies
Since I guided more than I fished this season, I should factor that data in with my personal top flies. In past years, I didn't include the flies used in guide trips, but they are a large part of the data now. Here are the top three:
Between myself and my clients, we hooked almost 50% of our salmon on flies between sizes 10-14. I've had small fly years before, but never 50%. Conversely, we caught fewer on tube flies this season than during a normal fall. Almost every fish we hooked was while using a floating line and untapered mono leader.
My typical "Hail Mary passes" (Sunray fished fast or Snaelda fished slow) didn't work at all. This fall, it seemed like they either wanted a fly or they didn't. If they wanted it, they usually wanted it on the first pass. As such, we moved around quite a bit to find "players." Really working a pool seemed to have either no effect or a negative effect (you lose valuable time) this season. "Run and shoot"...like the 1990 Houston Oilers.
I will have some gear reviews coming up soon, as well as some fly tying stuff over the winter. I already have a couple orders of flies to tie for the upcoming season in Canada, so I might post a few of the interesting patterns here. In the meantime, thanks for reading this blog. I got a lot of great feedback this year. Have a happy holiday season!
The three slashes represent 32nd notes, you big dummy.
Around the time I began teaching drum lessons, one of my favorite students was a middle aged school teacher. She was a beginning drummer, but a very enthusiastic student. We worked through the material in Breeze Easy vol. I, which is the drumming equivalent of learning how to tie a Woolly Bugger. One day, she asked me a very basic question about drum roll notation. It was something I had known how to play for many years, but never considered the theory behind how it was written.
"Is it notated this way because,..?" she asked.
"Uh...yes, exactly," I replied. What I was actually thinking was, "Wow, I never thought of that before. It makes total sense! How could I miss that? I'm a conservatory-trained musician...how embarrassing!" A few minutes later, I said all of this out loud and we had a good laugh.
Besides the notation tidbit I learned that day, I learned another important lesson. Teaching is a two-way street. The teacher often learns as much as the student. I had heard it said before, but that was the first time I experienced it myself.
When I guide anglers, I try to focus on education. Often times, I learn as much as they do. In my experience, fish fighting technique is one of the more difficult things to teach. First, the angler must remain calm immediately after the excitement of the hookup. I try to explain the basics before a fish is hooked, then gently reinforce the points throughout the fight. Trying to coach someone while a fish is going bananas isn't easy, though. Over the past few years, I've noticed some technical areas which can be improved upon, resulting in more fish landed and safer releases for the fish. The following tips pertain mainly to freshwater fishing in rivers.
Henrik Mortensen displays several of the fish fighting tips below
Tip #1: The Game Plan
Before fishing a run, pool, etc., form a fish fighting/landing game plan. It can be hard to think clearly with a big, strong, leaping fish at the end of the line. It pays to scope out the area to find suitable spots from which to fight and land fish. This is especially important when fishing solo. Once the game plan is in place, try your best to stick to it. Fish can be unpredictable and they don't always follow the script. However, with good technique, a fair number can be controlled with solid technique and a good strategy.
Tip #2: Be Mobile
This one baffles me. If the fish moves throughout the fight, why doesn't the angler? The fish struggles to get a good position so it can free itself. The angler should attempt to gain a favorable position on the fish so it can be fought as quickly and efficiently as possible. Whenever possible, I prefer to stay parallel with the fish, not downstream of it and definitely not upstream of it. If I keep the fish on a relatively short line, I can see the moves it makes and adjust instantly, keeping the maximum amount of pressure on a fish.
Of course, it's not always possible to move around. Deep water or big obstructions can block our downstream movement. My favorite spring fishing spot is like this. Fish must be hauled upstream against a heavy current. As a result, I lose more fish than I'd would if I could reposition myself. Also, some anglers might not be as steady on their feet as others. Older anglers often have to fight fish from one position. For the young and able bodied, however, it pays to keep moving.
Tip #3: Call the Shots
Assuming we're not fishing with really light tackle, the angler has the advantage most of the time. We shouldn't let the fish dictate the terms of the fight. With good technique, we can make all but the most crazy and unruly fish go where we want them to go. When we pull hard, the fish wants to pull hard in the opposite direction. When we ease off the pressure, the fish usually backs off. Use light pressure around treacherous obstacles like boulders, downed trees, bridge pilings, etc. If the obstacle is downstream, get below the fish and pull like hell. Often times, the fish will move upstream, clear of the obstacle. When it runs back down, ease up until the fish can be brought back upstream. Then pull like hell again.
Don't let the fish call the shots. The longer it's on the line, the more time it has to get free. Even if it's landed, a fish fought for a long time might be exhausted. Call the shots. Fight them fast and hard. The angler is in charge!
This angler applies heavy pressure and pulls the hook into salmon's mouth.
Tip #4: Pull the Hook Into the Mouth
If a fish can be kept relatively close, the angler can see which direction the fish faces at all times. If the fish is facing upstream, pull the hook into its mouth by angling the rod downstream. If the fish changes direction, make a smooth change of direction with the rod. We want to prevent pulling the hook out of the fish's mouth. Keeping the line tight pulling the hook into the fish's mouth (whenever possible) helps keep the fish on the line. This gets trickier with small hooks, so be careful.
Pulling the fish in either an up or downstream direction requires using side pressure. Bend the rod to the cork and put the wood to 'em! This is essential with big, powerful fish. We have to fight these fish hard or else we'll never break them.
Tip #5: Keep the Line Tight
The angler should keep a tight line however possible. If a fish is always pulling downstream, this usually isn't difficult. I see many fish lost when an abrupt change of direction happens. The fish runs downstream, then stops and runs right towards the angler. There are times when we can't reel up the slack fast enough to stay tight, even with a large arbor reel. When this happens, I strip in line with my reel hand.
It is a risky move. The fish can take off downstream again and the loose line might get stuck on something. I try to strip in line while pinching it against the cork and keep pressure on the fish. As soon as I feel the fish stop moving towards me, I reel up the slack as quickly as possible. Sometimes the fish starts to move towards me again before all the line is reeled up, forcing me to go back to stripping. It can be a delicate operation, but it often is the difference between a fish lost and a fish landed.
This fish would not have been landed without stripping in a lot of slippery
running line. Sometimes we have to take risks.
Tip #6: Low Rod
When guiding, I see this mistake more than any other, trout anglers being the main offenders. When fighting a fish, the angler keeps his or her rod up in the air. No, no, no! First of all, the fish will be fought from the tip of the rod, which is its weakest section. We want to fight the fish from the butt end of the rod. Also, unless you're Inspector Gadget, there is nowhere to go once an arm is fully extended. What if the fish runs around a rock? The angler can't lift the line any higher to clear the rock. The default rod position should be low. Use the fighting butt!
Tip #7: Fight Them Hard, Take Risks
If you plan on releasing the fish, fight it hard. Don't mess around. Get that fish in as quickly as possible so it can be released safely. You might lose some, but you'll probably lose more if you let the fish control the fight.
Take risks. The worst that can happen is that the fish will get off. It might get off if the angler doesn't take the risk. Any day might be your lucky day, but you'll never know if you don't test your luck regularly.
----------------------------------
I've lost some pretty nice fish. One in particular will be forever burned into my memory. Years later, I still replay the scene in my mind, thinking of what I would do differently now. That salmon dictated the terms of the fight. I complied. Ultimately, she broke me off on a rock. If I had moved with the fish, applied more pressure at strategic times, and controlled the fight, I might have landed her. I lost a beautiful, bright salmon, but the experience taught me a lot. These are some of the lessons I hope to pass on when guiding. When I'm just an observer, I can watch both the angler and the fish and, often times, I become the student.
Had I taken some risks, this one might have been landed...lesson learned
This blog features some of my favorite Atlantic salmon flies and the occasional trout or saltwater fly. From time to time, I will feature flies from some of my favorite fly tyers, as well as product reviews, fishing reports, and interviews. I hope you enjoy it. Please feel free to contact me with any questions or comments you might have.










 Posts
Posts


