 |
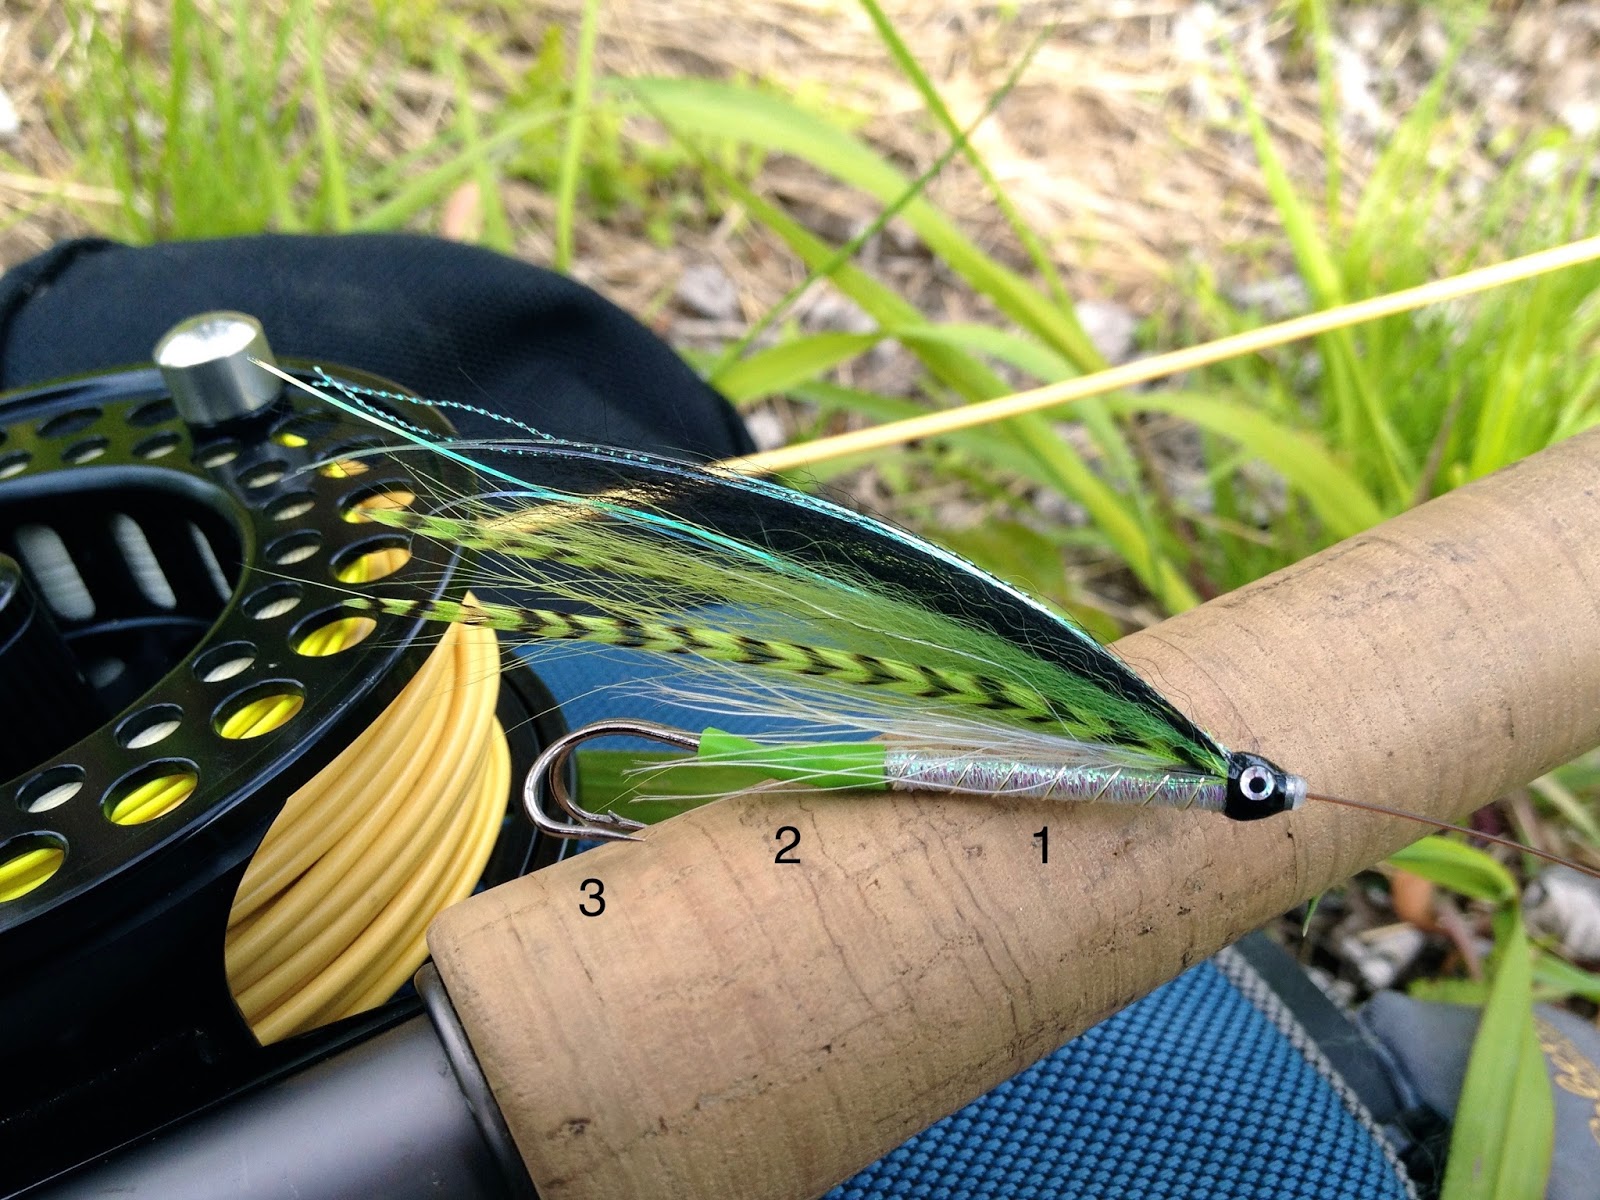
| Fig. I: The standard tube fly rig 1. Fly tied on a rigid tube (plastic or metal) 2. Flexible junction/hook holder tubing 3. Short shanked hook (single, double, or treble) |
Over the past few years, I have given away many tube flies. Most recipients of these "gifts" had never seen a tube fly before. After a reasonable amount of time, I would inquire about the fly's performance. "I never tried it. I don't know how to use a tube fly," was a common answer. Rigging seemed pretty self explanatory to me, but I realized the problem was my own. Tube flies are quite different from conventional flies and I should have offered a little bit of instruction to go along with each of these flies. Hopefully, this post provide some insight on the basics.
Regardless of how we choose to rig our tube flies, there is one thing each option has in common with one another. The hook is never permanently affixed to the fly. That is perhaps the single biggest advantage to using tube flies (for reasons listed here, amongst other places). Since the hook is not a part of the fly, we don't need one hook per tube fly. A small assortment of hooks will suffice.
The most common way to rig a tube fly is by using a flexible junction tubing (aka "hook holder" tubing) that slides over the back end of the tube fly. Junction tubing is most often made from silicone or PVC. Silicone's best asset is its flexibility. It is my choice when I need to slip junction tubing over a tube fly with a thick body and/or when I use larger hooks. PVC is more rigid and durable. I use it for flies with bare tube bodies, with smaller hooks, and when a longer piece of junction tube is desired. I prefer to add junction tubing after tying the fly so I do not have to fumble with it while on the river.
To see how this rig works, look at Fig. I. Thread the tube fly (without hook) onto the leader. Let the tube fly fall down the leader. Choose a straight-eyed, short shanked single, double, or treble hook. Tie the hook on with the knot of your choice. I use a clinch knot. After trimming the tag end of the knot, pull the tube fly back towards the hook. Then, pull the hook into the junction tubing. The hook should fit snugly inside the junction tube and the fly is ready to fish.
 |
| Fig II: Hook inserted directly into plastic tube |
 |
| Fig III: Loop knot and free swinging hook |
 |
| Fig. IV: Loop knot w/plastic bead |
 |
| Fig. V: Standard rig w/extended junction tube |
I find the rig in Fig. V preferable to the loop knot method shown in Figs. III and IV. Both silicone and PVC junction tubing hold a hook more securely than a loop knot. Unless your tippet is thick, a loop knot may cause your hook to droop in slower currents. A longer piece of junction tubing can be used to support the loop but, if you're going to use longer junction tubing anyway, you might as well opt for the method shown in Fig. V. Another reason I like the long junction tube rig is the ability to make changes in hook placement quickly and easily.
Whichever method is used, it is important to consider the aggressiveness of the fish before rigging up. When the water is warm and the fish are taking aggressively, I want my hook to sit closer to the front of the fly (see Fig. VI). If an aggressive taker grabs a fly with a hook mounted too far rearward, ithe fish might take the hook too deeply. When designing and tying your tube flies, take this into account. A fly with body as long as the materials might not be as useful when the fish are eager to inhale a fly. To make my flies as versatile as possible, I prefer to tie them so they can be used effectively with many types of rigs.
 |
| Fig. VI: The Picasse tube fly with standard hook placement |
----------------------------------------------------------
I hope some readers find this post helpful. I encourage you to look at other sources for more ideas. For those of you who might be interested in a more in-depth look at tube flies, their uses for multiple species, and their construction, I offer a presentation called "An Introduction to Tube Flies: Fishing and Tying." I would love to present it at your angling club, fly shop, or event. It has proven very helpful to those who were previously unfamiliar with the benefits of fishing tube flies. Click here for more information. As always, feel free to ask any questions you might have.


No comments:
Post a Comment
Note: Only a member of this blog may post a comment.