 |
| American shad are loads of fun on light tackle. |
What I enjoy most about the spring fishing season is its diversity. Spring is a time when unrelated species of anadramous game fish cross paths with each other as they travel upriver. At sea, however, they are scattered all over the Atlantic. American shad migrate to the Bay of Fundy in eastern Canada. Atlantic salmon migrate to the feeding grounds around Greenland and the Faroe Islands. Striped bass head north from Chesapeake Bay. I have no idea where our alien sea-run brown trout go, but I imagine they stay fairly close to home. The one thing they all have in common is the last leg of their respective journeys. Spring is a time when an angler might not know what is on the end of his or her line but, if it is fresh from the sea, chances are it will be an exciting battle.
The past couple of seasons, American shad fishing has caused me to put my normal routine on hold. The Connecticut River run has been around 300,000-400,000+ shad the past couple years, which is significantly more fish than the rest of the spring gamefish run combined. After a long winter, it can be nice to catch a lot of fish. A lot of hard fighting fish, as the case may be. Enough fish to decimate a fly box if an angler isn't careful. Shad don't have teeth, but catching twenty, thirty, forty, or more, in a day will destroy flies. If the fish don't wreck them, the bottom will, since most shad like a fly presented low in the water column.
As such, it doesn't pay to spend much time tying shad flies. The fish aren't too picky. They're not eating. Even if they were, they feed on plankton, which is much smaller than our flies. They seem to lock into certain colors at times, so I like to tie a few different flies in several different colors. When the water is low, I like to fish a small beadhead softhackle (tied in psychedelic color schemes). When I need to get down quicker, I use a fly with a UV resin body to sink quickly. My bread and butter fly, the simplest of them all, is the subject of this post.
As such, it doesn't pay to spend much time tying shad flies. The fish aren't too picky. They're not eating. Even if they were, they feed on plankton, which is much smaller than our flies. They seem to lock into certain colors at times, so I like to tie a few different flies in several different colors. When the water is low, I like to fish a small beadhead softhackle (tied in psychedelic color schemes). When I need to get down quicker, I use a fly with a UV resin body to sink quickly. My bread and butter fly, the simplest of them all, is the subject of this post.
There are many step-by-step fly tying tutorials out there. What I want to focus on here is the reasons why I have made the decision to use certain materials or techniques. Some of the reasons may be obvious, some may not. Since this generic fly template is an easy tie for all skill levels, I hope the reader will key in on why decisions were made in addition to how the fly is constructed.
 |
| The killer fly, tied in Chinese Red This is why it pays to use easy, inexpensive flies. |
Simple Shad Fly
Hook: Crappie/panfish hook- light wire, gold, Aberdeen bend (i.e. Mustad 3260B or Eagle Claw equivalent); sizes 4-8
Thread: Danville Flymaster 3/0 (210 denier)
Eyes: Dumbbell or bead chain eyes
Body: Danville flourescent nylon wool (blue, green, pink, & orange) or Uni-Yarn (Chinese red)
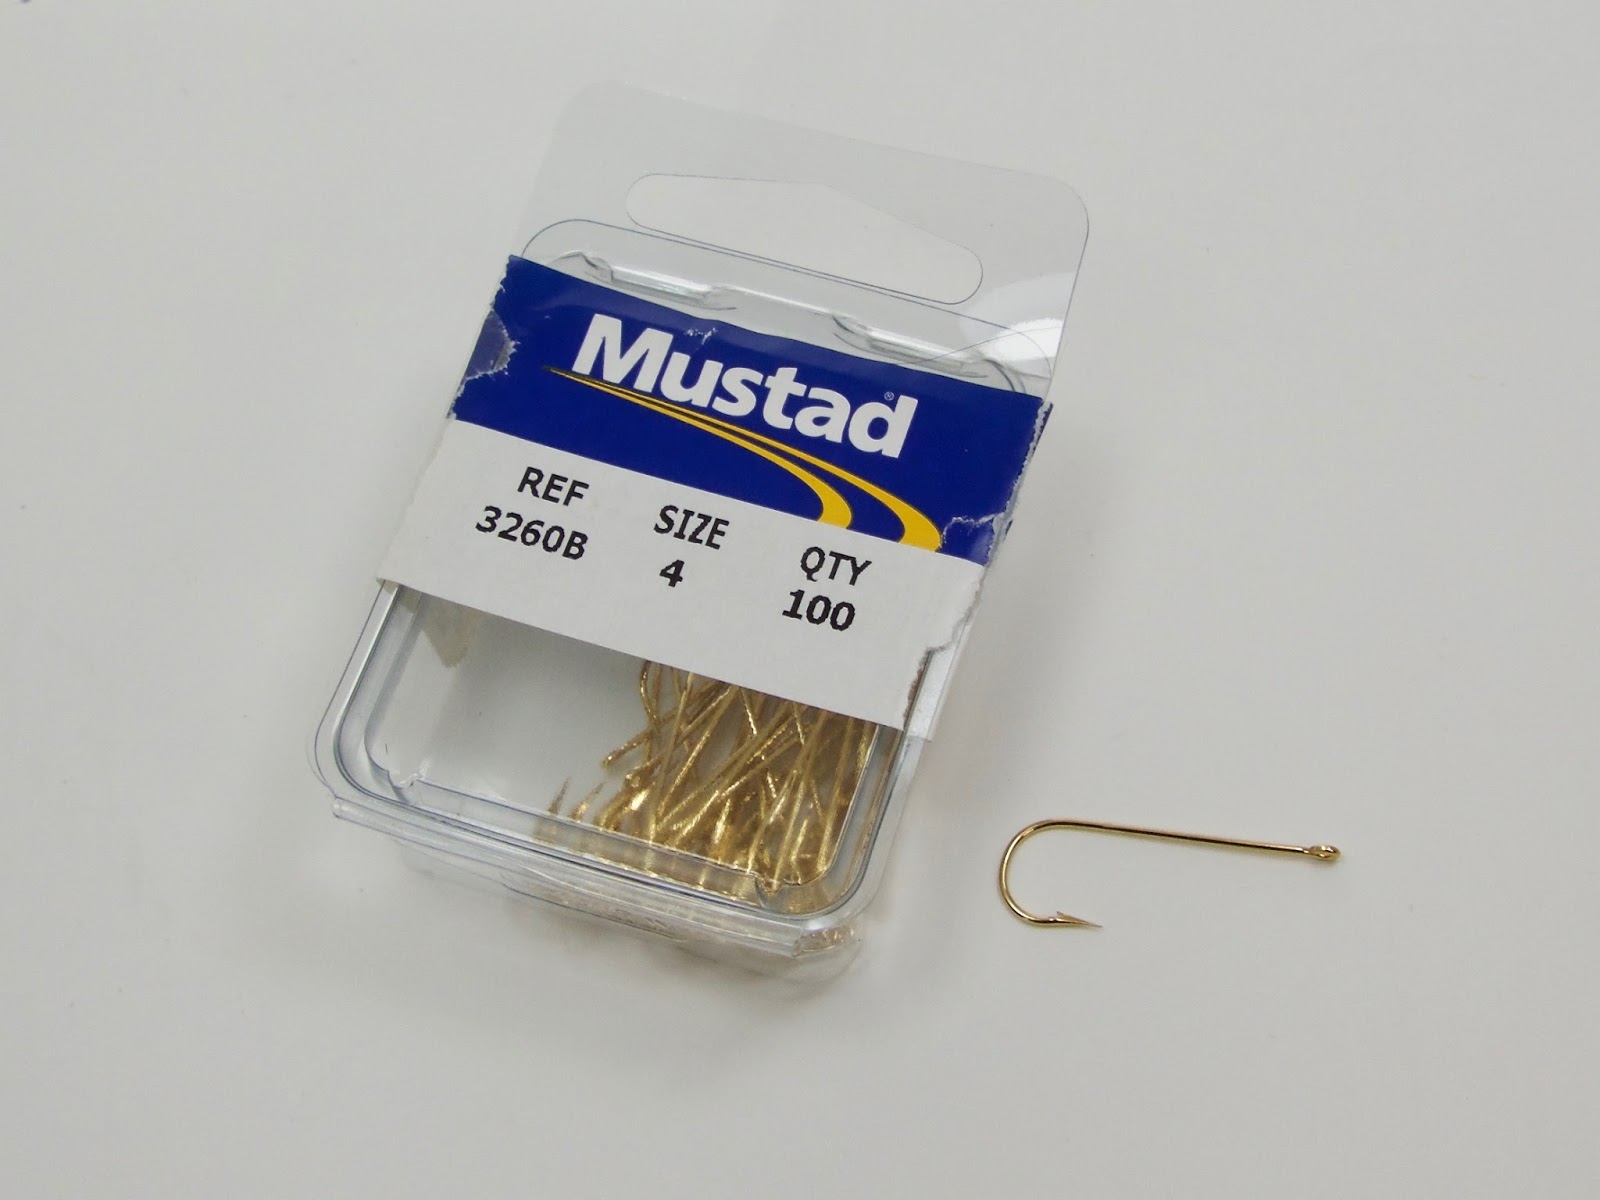 |
| Fig. I: Gold panfish/crappie hooks |
 |
| Fig. II: Making a thread bump |
 |
| Fig. III: Adding brass dumbbell eyes |
When tying in the eyes, use a figure eight motion to lock them in. After they are seated, I like to use a lot of thread tension to keep them in place (hence the 3/0 thread). I pull as hard as I can without breaking the thread. After the eyes are tied in, I add a drop of super glue to the thread. After catching a ton of fish, the eyes will eventually move around. The goal is to keep them firmly in place for as long as possible.
If you are tying a lot of shad flies at one time, it makes sense to tie up to this step, then place the hook aside and wait for the glue to dry. I usually pre-tie a bunch of eyes and keep them in a compartment-style fly box. When I need a certain color fly in a certain size, I take the eyed hook out and the rest of the fly can be finished in a minute or so.
 |
| Fig. IV: Laying down a thread base |
 |
| Fig. V: Adding a short tail of flash |
Since it is common for American shad to nip at the rear end of a fly, I like to keep my tails short. I don't tie them any longer than in the fly pictured above, and often times I tie the whole fly shorter. To tie it "low water style," start the body just above the hook point and cut the tail flush with the bend of the hook. As much as possible, I try to avoid the shad grabbing the rearmost part of the fly without grabbing any of the hook. A fly tied a bit undersized for the hook helps prevent the nipping.
Fig. VI: I like to use wool yarn for the body of this fly. It absorbs water and tends to get buggier looking as the fly gets chewed on. My favorite yarn is Danville's fluorescent nylon wool. The colors are spectacular for shad flies. I like their fire orange, green, blue, and fluorescent red (pictured here, which is really more like fuchsia than actual red). Since Danville doesn't make a real red color, I use Chinese red Uni-Yarn instead. It is a truly deadly color.
Fig. VII: Wrap the yarn up the hook shank and figure eight the yarn around the eyes several times. Tie it off, whip finish, and add head cement. Sometimes I tie two whip finishes and skip the cement. If desired, a contrasting fluorescent color can be used for the head. Just make sure the thread color lighter than the color of the body material so it doesn't show through when the fly gets wet.
 |
| Fig. VI: Tying in wool for the body |
 |
| Fig. VII: The completed shad fly |
---------------------------------------------
Well, that's about as easy to tie as it gets. They are cheap, easy, durable, and very effective. If you live near a shad run, give it a try. In an upcoming post, I will explain the other two pattern templates I use. For lots of good information about fly fishing for American shad, click here to check out my buddy Sonny's blog!
 |
| Releasing a fresh one back into the Connecticut River (photo by M. Taylor) |


Good Read Ben!! I used to fish for shad at the Enfield Dam, many years ago.
ReplyDeleteThanks, Pete!
Delete